Nano-Bananary, also known as "Banana Supermarket" in Chinese, is an open source application. It allows users to easily generate and edit pictures and even videos. The most important feature of this tool is "one-click generation", users do not need to write their own complex prompts. All you need to do is upload an image, select a preset "play", and the system will automatically process and generate new content. It also supports the modification of specific areas of the picture, called "localized selection". What's more convenient is that the result of each generation can be used directly as the starting point for the next edit, which forms a continuous workflow. Recently, the project also added video generation, which can convert images into dynamic videos. The entire project is built on React technology and Google's Gemini API, and users can either use it online or download it to run on their own computers. For users who don't want to write prompt words but want to experience the fun of AI creation, this is a very friendly tool.
Open source version of the transit API is supported: https://github.com/ycyy/Nano-Banana-Supermarket
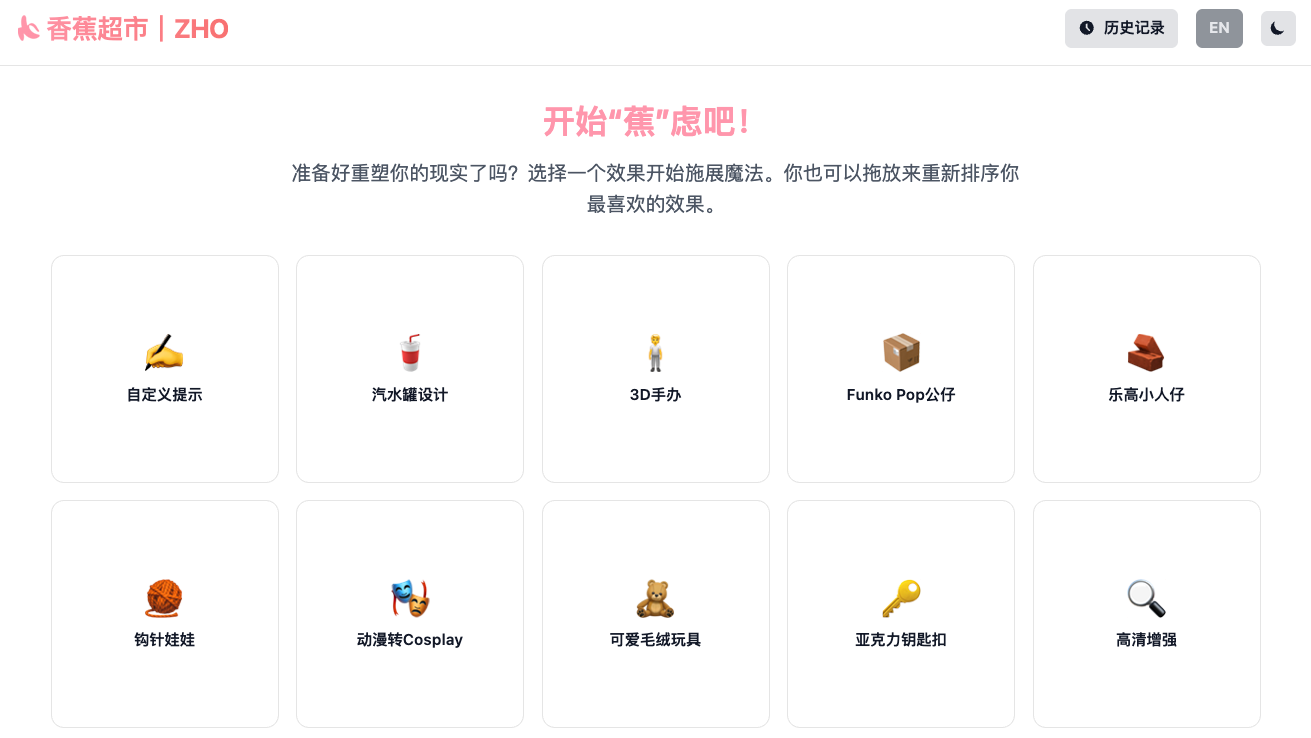
Function List
- Multiple preset play styles: A variety of image generation styles and templates are built-in, so users don't need to write cue words and can generate them with one click by choosing a play style.
- Continuous photo editing: Supports using the last output image directly as input for the next operation, enabling uninterrupted creation and modification.
- Localized Selection Modification: Provides a masking feature that allows the user to paint a specific area of the image and then regenerate or modify it for that area only.
- Video generation with one click: You can convert still pictures or edited pictures into short videos with one click to add dynamic effects.
- History View: The system automatically saves the user's generation history, making it easy to view, compare or reuse previously created images at any time.
- Multiple comparison viewsThe "Horizontal Comparison" and "Slider Comparison" modes allow users to visually compare the generated image with the original image.
- Customized Cues: In addition to preset play, it also provides advanced users with an input box for custom cue words to meet personalized creation needs.
- Theme and Language Switching: Support Chinese and English language interface, and can be a key to switch the light or dark theme.
- Image Preview and Download: Supports zoom-in preview of generated images and allows direct download of comparison images.
Using Help
Nano-Bananary is a very accessible tool that offers both online and local usage, making it easy for different types of users to experience AI creation.
Online use (recommended)
For most casual users, the easiest way to do this is to simply use a program hosted on the AI Studio on the online version.
- access address: Open your browser and visit the AI Studio link provided on the project homepage:
https://ai.studio/apps/drive/1JknFrFFdiOm7FIA8MLOJa_vtJN2g24c1。 - Waiting to load: It may take some time for the app to load for the first time, and you can see the main interface after it finishes loading.
- Interface Layout:
- Left control areaHere is the core operation area. You can upload images, choose the "play" you want (i.e. preset style template), and adjust the relevant parameters.
- Right display area: Your original and AI-generated result images are displayed here. You can preview, compare and download the images using the toolbar at the top.
Operational Processes:
- Upload a picture: Click on the Upload button on the left and select a local image you want to edit or recreate.
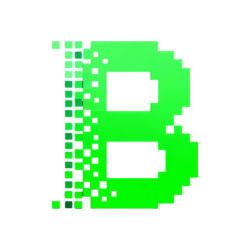
- Choose how to play: In the "Select Usage" drop-down menu, browse and select a style you are interested in, such as "Stickers", "Figures" or "Pixels". ", etc.
- Generate Image: Click on the "Generate" button. After a moment, a new image will appear in the display on the right, generated according to the play style you have chosen.
- Local modifications (optional):
- If you only want to modify a certain part of the picture, you can click on the "Localize" button.
- At this point, the mouse will turn into a paintbrush and paint the area of the picture you want to modify.
- When you are done painting, click the "Generate" button again and the AI will redraw only the areas you painted.
- Continuous editing (core functionality):
- When you are satisfied with the results, but want to make further adjustments, you can click the "Send to New Play" button at the bottom of the display.
- This action sends the current result image directly to the "Upload Area" on the left side as the "original" image for the next creation.
- Next, you can choose a new playthrough, or continue to iterate with the current playthrough until you get satisfactory results.
- Generate VideoWhen you get a satisfactory still picture, you can try the new video function. Click the button related to "Video Generation" on the interface, and the system will transform the current image into a smooth short video.
- Compare & Download:
- At the top of the right display, there are tools such as "Zoom Preview", "Landscape Compare" and "Slider Compare" to help you scrutinize and compare the details of the images.
- After confirming the image effect, you can directly download the generated image or comparison image.
local deployment
If you are a developer or want to use it on your own computer without restrictions, you can follow the steps below for local deployment.
Environmental Preparation:
- Node.js: Make sure you have the Node.js environment installed on your computer, as the project runs based on it.
- Gemini API Key: you need a Google Gemini API of the key. This key is the credentials for the AI model service and can be retrieved from the Google AI Studio The official website is free to apply.
Installation Steps:
- Download Code:
- Open the project's GitHub page:
https://github.com/ZHO-ZHO-ZHO/Nano-Bananary。 - Click on the green
Codebutton, and then select theDownload ZIPDownload the project code locally. Or, if you are familiar with Git, you can use the commandgit clone https://github.com/ZHO-ZHO-ZHO/Nano-Bananary.git。
- Open the project's GitHub page:
- Installation of dependencies:
- Unzip the downloaded file (if applicable) and go to the project root directory in a terminal or command prompt.
- Run the following command to install all the dependent libraries required by the project:
npm install
- Configuring the API Key:
- In the project root directory, find or create a file named
.env.localof the document. - In that file, add the following to it and set the
YOUR_GEMINI_API_KEYReplace it with the key you applied to yourself:GEMINI_API_KEY=YOUR_GEMINI_API_KEY
- In the project root directory, find or create a file named
- Initiation of projects:
- Once the configuration is complete, run the following command in a terminal to start the local development server:
npm run dev
- Once the configuration is complete, run the following command in a terminal to start the local development server:
- Access to applications:
- The terminal displays a local URL, usually
http://localhost:5173。 - Open this address in your browser and you'll see the exact same interface as the online version and get started.
- The terminal displays a local URL, usually
application scenario
- Social Media Content Creation
Users can upload their own life photos or pet photos, and use "stickers", "handmade items" or "pixel style" to quickly generate a unique style of pictures, which can be used to publish on social platforms such as Xiaohongshu The program can be used to post on social media platforms such as Xiaohongshu, Weibo and other social media platforms to enhance the fun and attractiveness of the content. - Avatar and emoticon creation
By uploading your personal avatar, you can generate cartoonish, clay-style or various artistic effects in one click to make a unique and personalized social avatar. You can also use the localized selection function to add interesting elements to the picture to make a fun emoticon pack. - Design inspiration and sketch visualization
Designers or artists can upload their design sketches and utilize AI to quickly generate renderings in different materials, lighting and styles as a tool for finding inspiration or presenting their initial ideas to clients, which greatly improves work efficiency. - First experience with AI painting for the average user
For ordinary users who don't know how to write complex prompts, the tool provides a very low learning threshold. Users can experience the fun of AI painting and the process of turning ordinary photos into works of art by simply taking two simple steps: "choose how to play" and "upload images".
QA
- Is this tool free?
Yes, Nano-Bananary is an open source project and is free, both when using the online version and when deployed locally. However, please note that local deployment requires the use of your own Gemini API Key, and that API Key may have a limit on the amount it can be used. - Can I use it even if I know absolutely nothing about programming?
It's perfectly fine. For general users, we strongly recommend using the "online" version provided by the project, which does not require any programming knowledge, and can be operated like a normal retouching software by opening a web page. The local deployment process is mainly for developers who have some technical foundation. - What does the "Continuous Edit" feature do exactly?
"Continuous editing" is the core highlight of this tool. It solves the problem of "opening blind boxes" of AI-generated images. When you are not completely satisfied with the generated results, you do not have to start from scratch, but can take the current results as a new starting point, continue to choose to play with optimization or style overlay, just like constantly adding new layers on the drawing board, so that the creative process is more controllable. - What should I do if the result of the generated image is not satisfactory?
You can try the following methods: first, change different "play", each with a different style and effect; second, use the "partial selection" function to modify only the undesirable parts; finally, you can use the "continuous editing" function to generate the result again on the basis of the current result. Finally, you can utilize the "Continuous Edit" function to generate the result again on the basis of the current result, and carry out several iterations, usually the result will be better and better.