Recently, AI application development platform Coze announced the official open-sourcing of its Studio version, a major milestone for the developer community. This initiative means that developers can privately deploy Coze's Visual Intelligentsia (Agent) development kit to build and manage AI applications while safeguarding data security and version stability.
For enterprises and developers, localized deployments address a core pain point that has long relied on cloud services. Unexpected outages that can be triggered by cloud platform version iterations or plugin tweaks are significant risks to delivered projects. Open source versions, on the other hand, give development teams complete control and ensure stable workflows over time.
This tutorial will detail how to accomplish this on a cloud server Coze Studio of localized deployment. The entire process follows a step-by-step illustration designed to be successfully practiced by developers of all experience levels.
Estimated completion time: approximately 25 minutes
Technical prerequisites: Familiarity with basic Linux command line operations and understanding of Docker concepts.
Deployment Process Overview:
- Preparing Cloud Servers
- Configuring the server environment
- deployments Coze Studio
- Getting and Configuring the Model API Key
- Launch and access Coze Studio
I. Preparing Cloud Servers
Deploying Coze Studio requires at least one 2-core 4G Configured cloud servers.
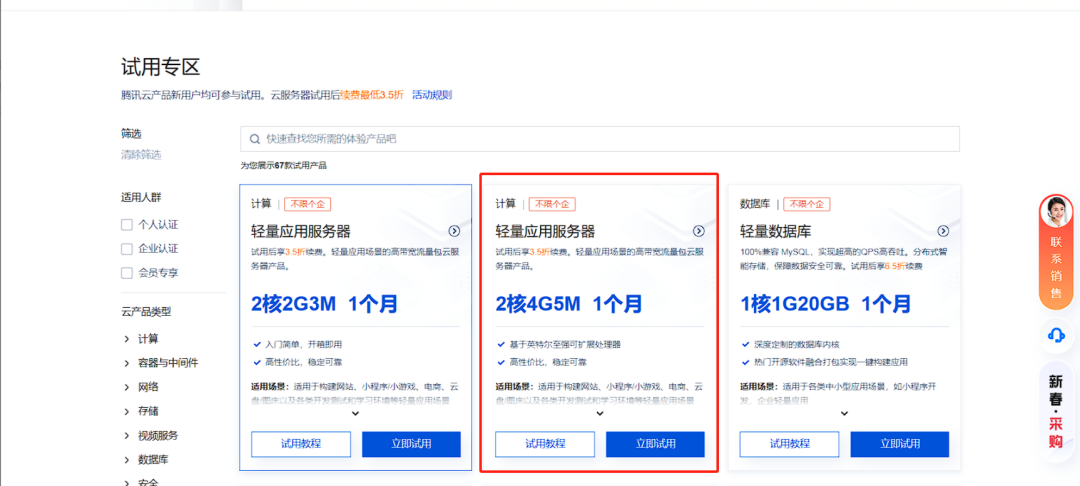
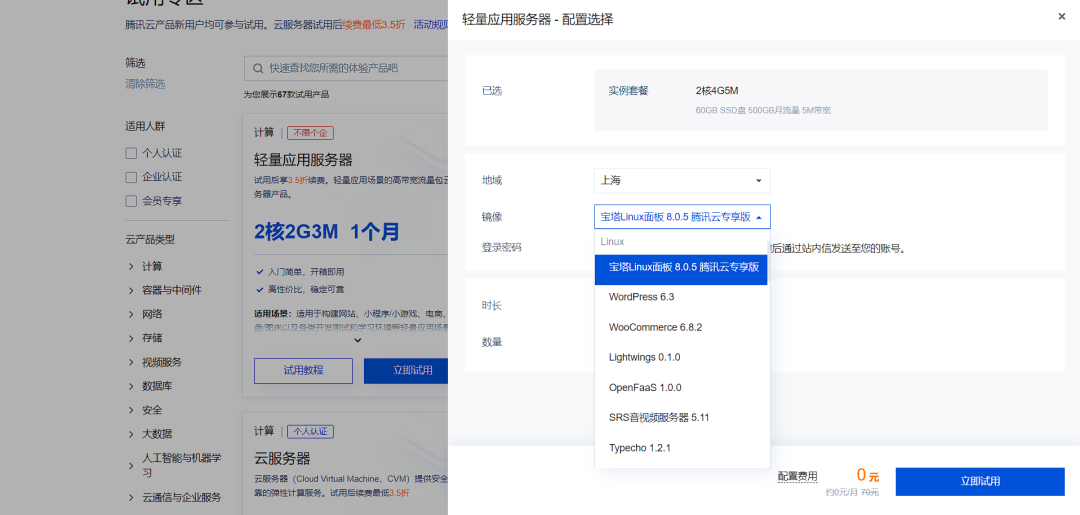
- Choose and sign up for a cloud service provider. In the case of Tencent Cloud's lightweight application servers, for example, new users are usually entitled to a free trial credit.
- Go to the Service Provider Console and select Purchase Server. In the configuration options, the image (Image) is recommended to choose a server with pre-installed Pagoda Linux Panel 8.1.0 This simplifies subsequent configuration of the environment. The region can be selected based on the access speed.
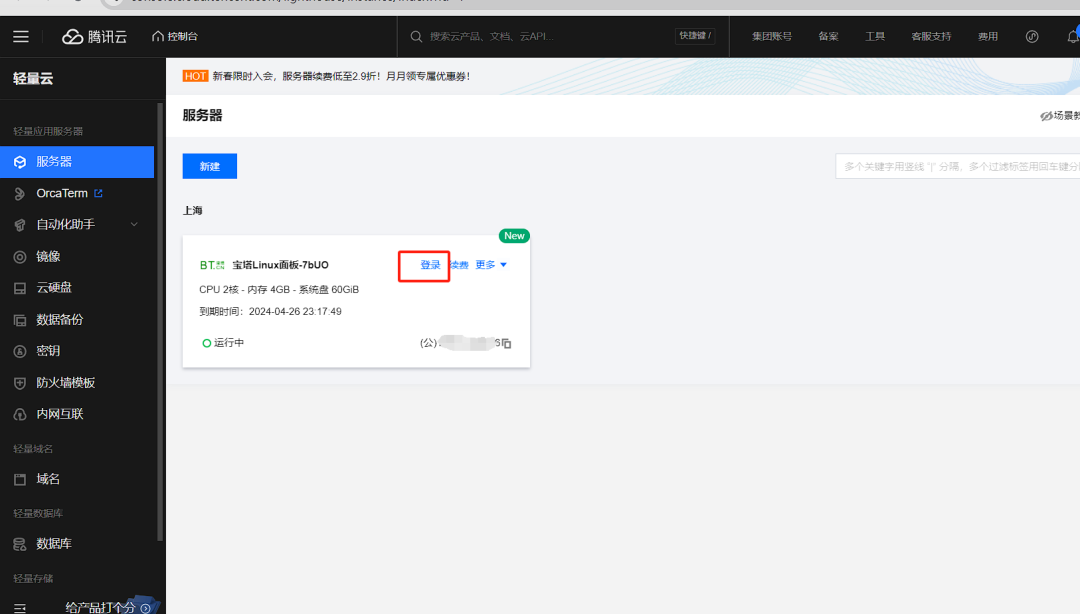
- After creating the instance, find the "Login" or "Terminal" function on the server management page to enter the command line interface of the server.
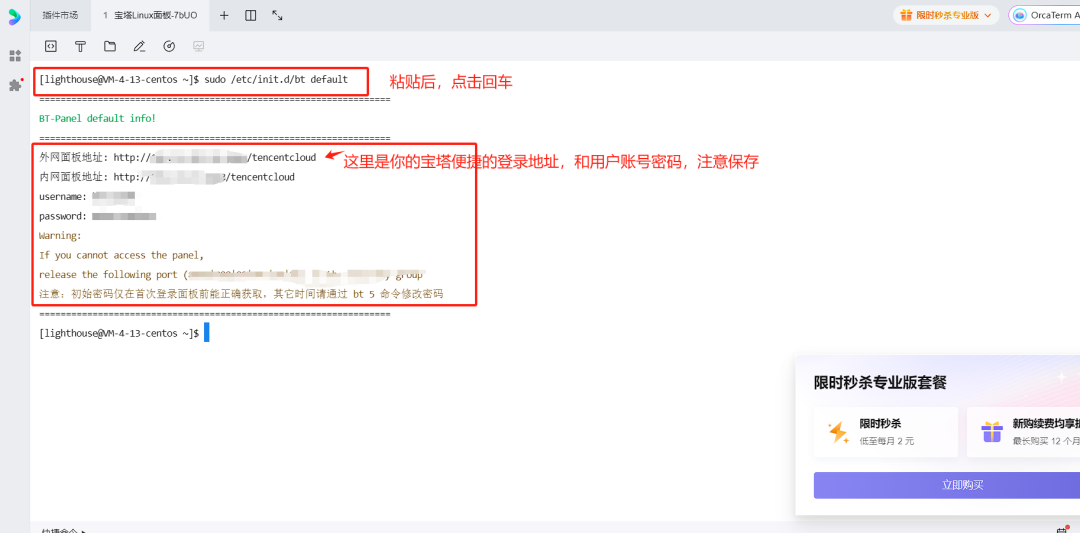
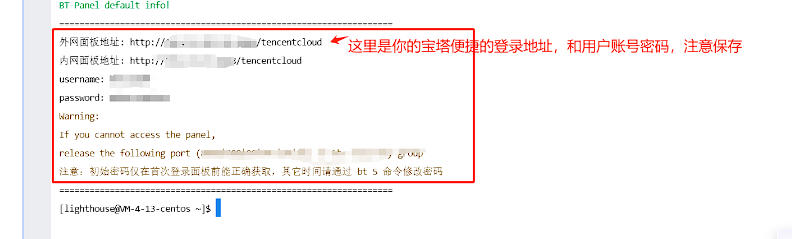
- After logging in, execute the following command to change the default port of the Pagoda Panel (from 8888 to 8887) to avoid conflict with the default port of Coze.
echo "8887" > /www/server/panel/data/port.pl
sudo /etc/init.d/bt default
After execution, the terminal will output the new panel access address, username and password, be sure to copy and save this information properly.
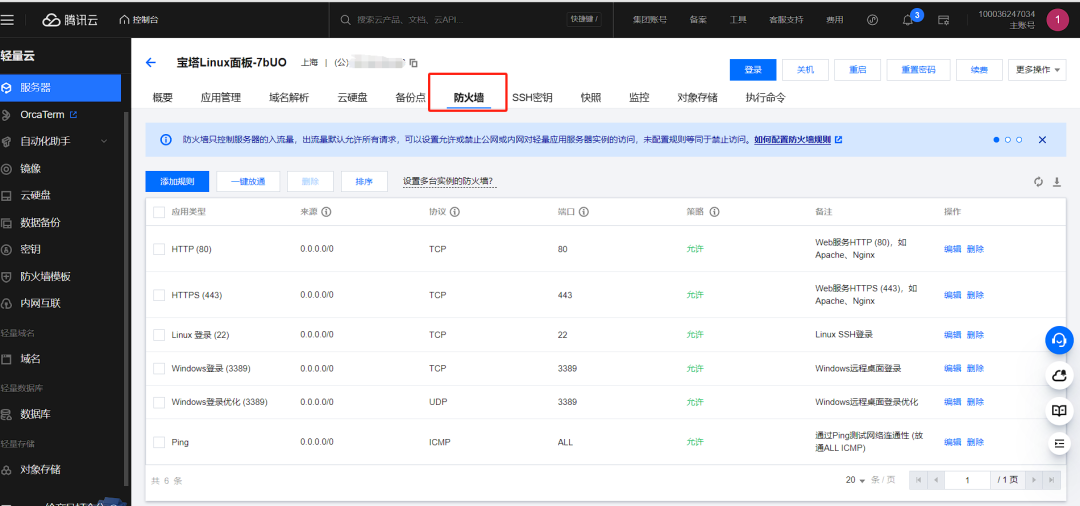
- Next, you need to configure the server's firewall rules to open the ports required by Coze Studio. Go to the server's firewall or security group settings page, add the rule, and release it
8887和9999Two ports.
II. Configuring the server environment
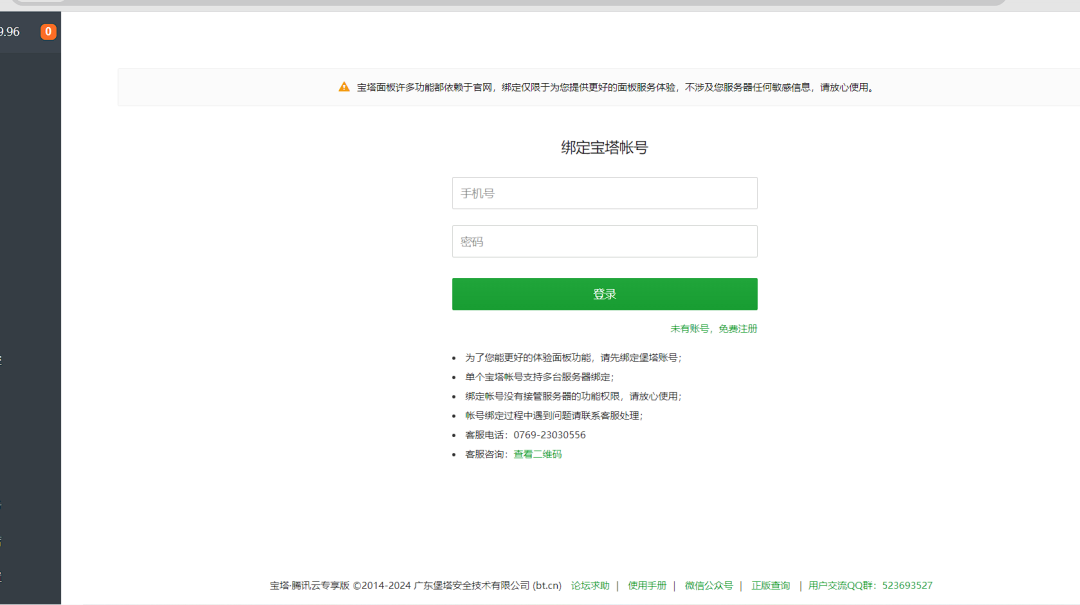
- Open the Pagoda Panel in your browser using the "Extranet Panel Address" you saved earlier. If the address starts with
loginending cannot be opened, please try to change the URL suffix totencentcloud。
- Enter your saved username and password to log in. The first time you log in you need to bind an official Pagoda account.
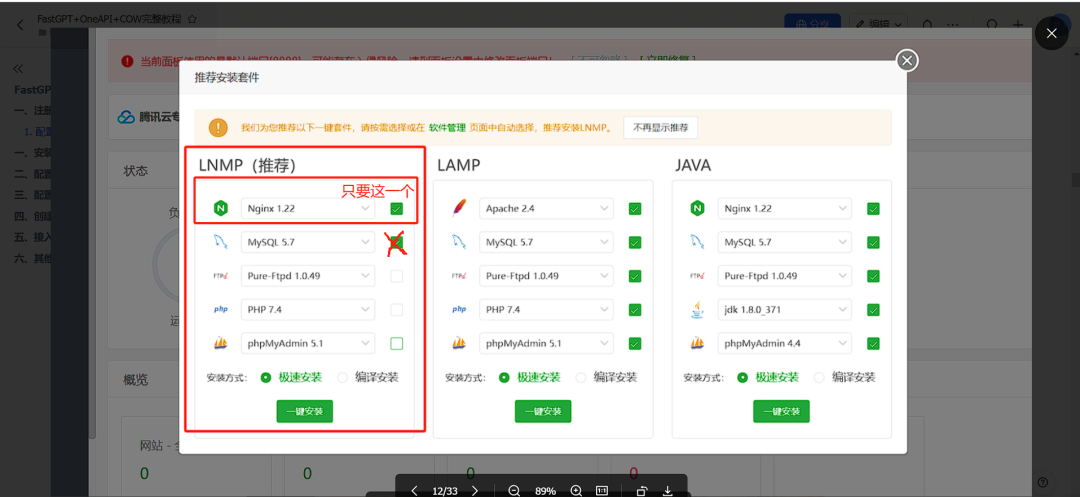
- After logging in, a pop-up window with recommended packages will appear, so just check the box and install the first one. Nginx, and the rest unchecked.
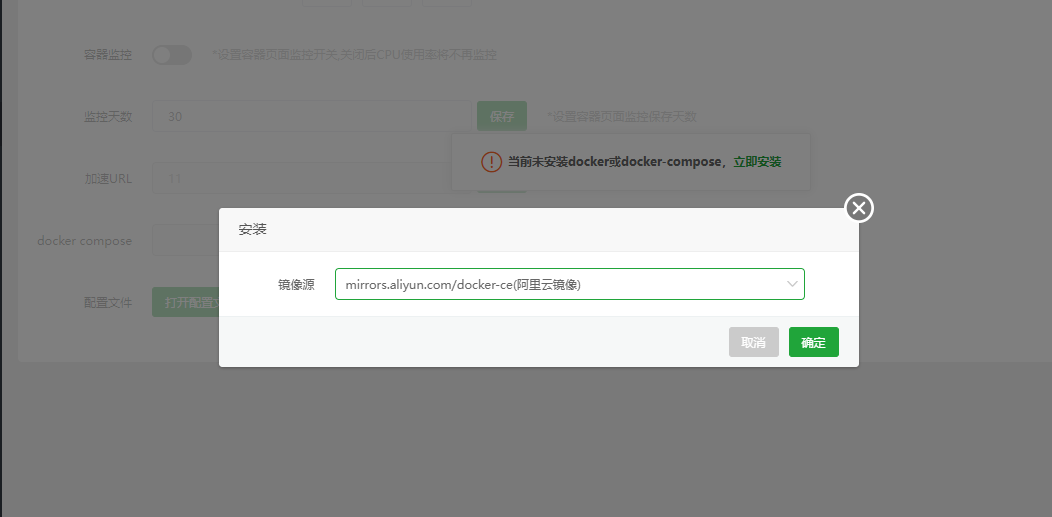
- Find and click "Software Store" in the left menu of Pagoda Panel, and select "App Categories". Docker Manager and install it. The installation process may take some time.
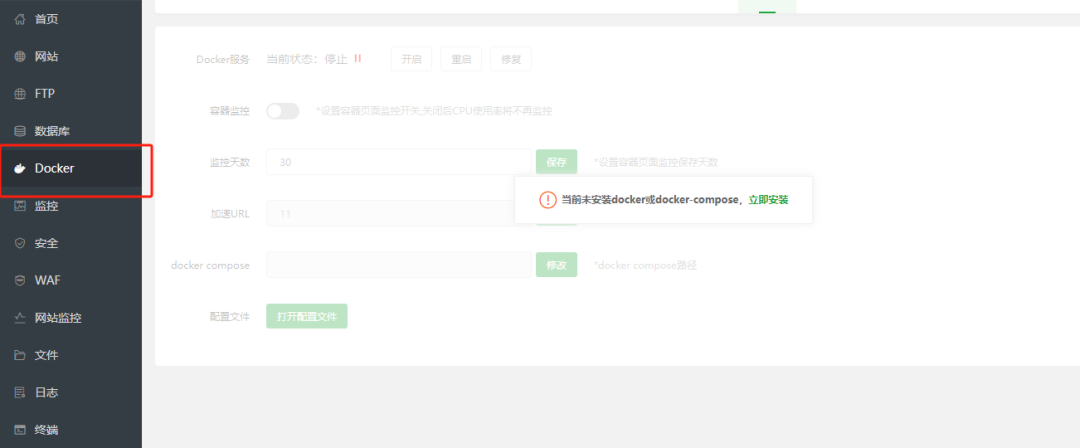
- After the installation is complete, refresh the page. Open the "Terminal" tool on the left side and execute the following command to verify it
Docker和Docker ComposeWhether the installation was successful or not. If you can see the version number output, the environment is ready.docker -v docker-compose -v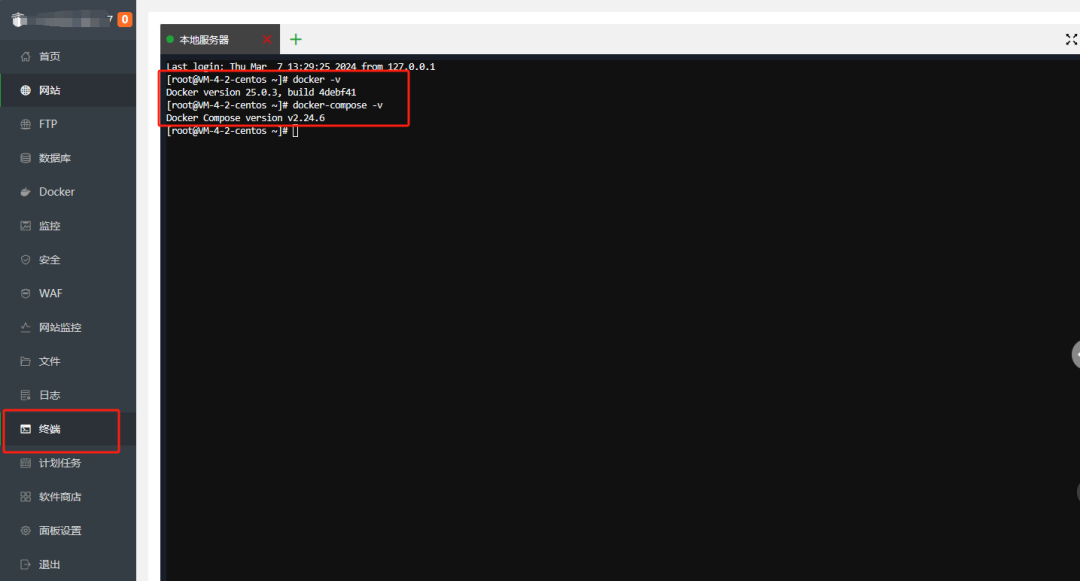
Deploying Coze Studio
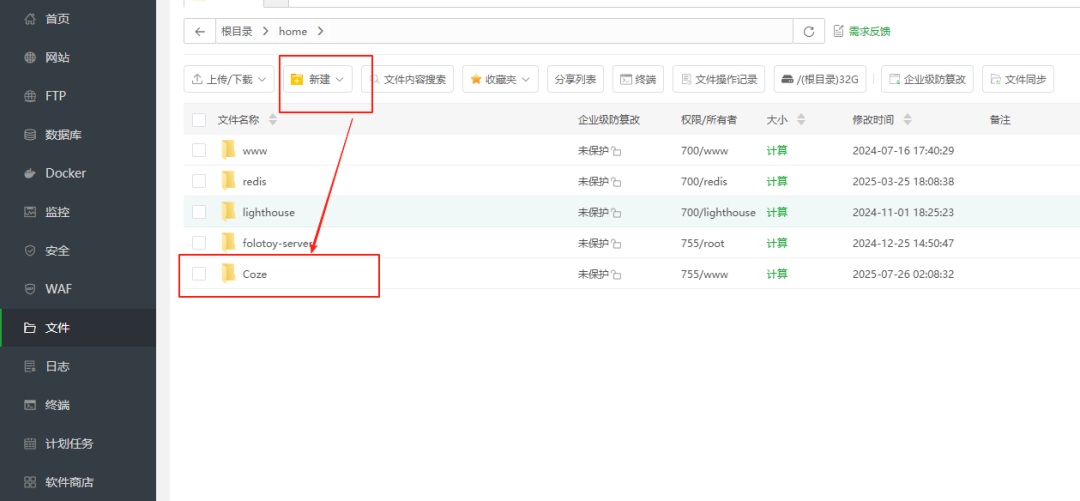
- In the Pagoda panel, go to the File Manager and locate the
/homedirectory, create a new directory namedCozeof the folder.
- Go to the newly created
Cozefolder, click the "Terminal" button at the top to open a new terminal window. Execute the followinggitCommand CloneCoze Studiosource code repository.git clone https://github.com/coze-dev/coze-studio.git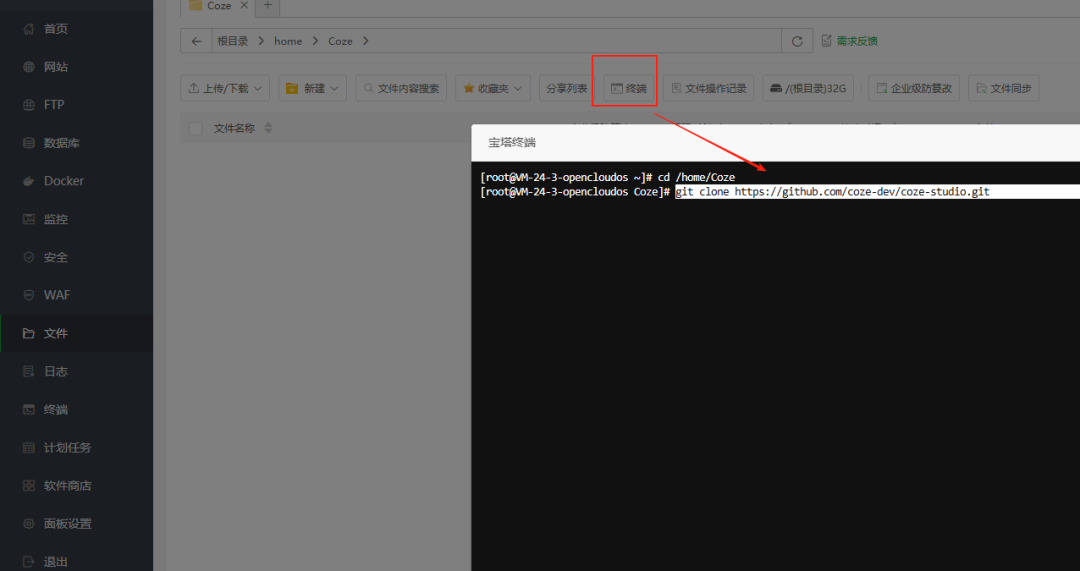
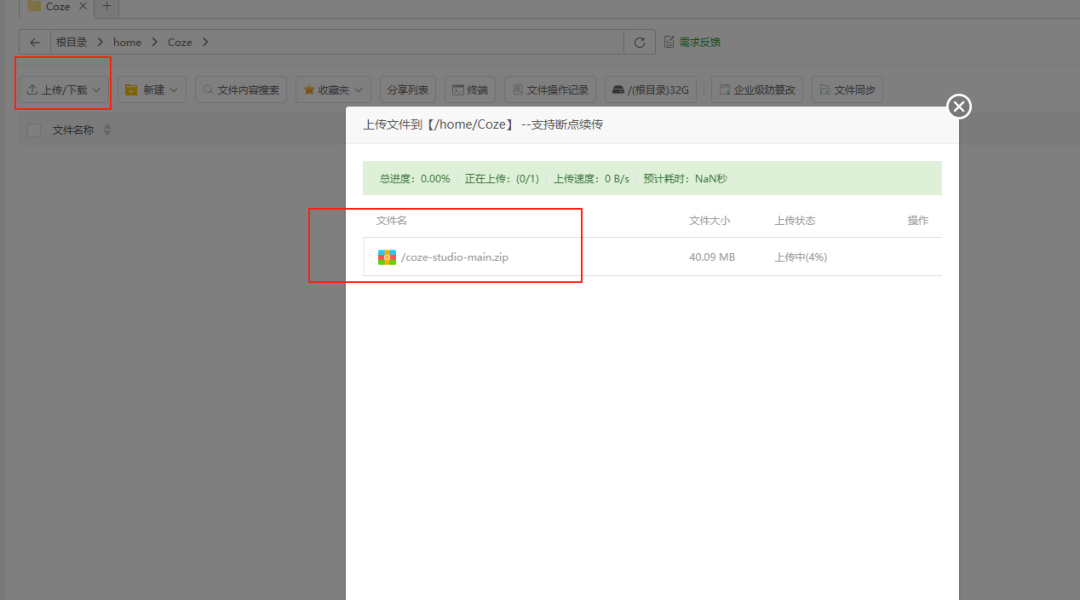
Alternative Programs: If a network problem causes
git cloneSlow or failing, you can visit directly GitHub repository address Download the ZIP archive and upload it to the server's/home/Cozedirectory and unzip it.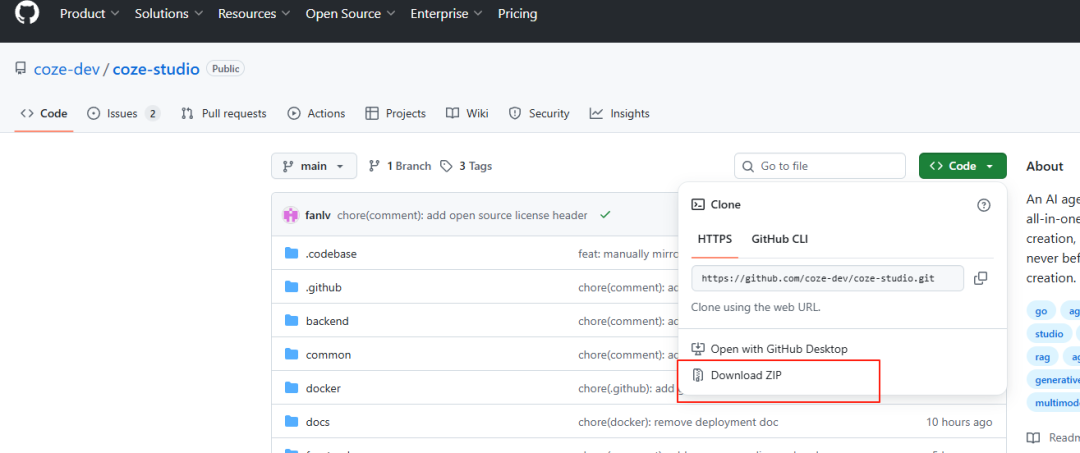
Getting and Configuring the Model API Key
Coze Studio A large language model needs to be connected in order to run. The tutorial uses the Volcano Engine's Ark model service as an example to demonstrate how to get the API Key and model access points Endpoint ID。
4.1 Obtaining Volcano Engine Model Credentials
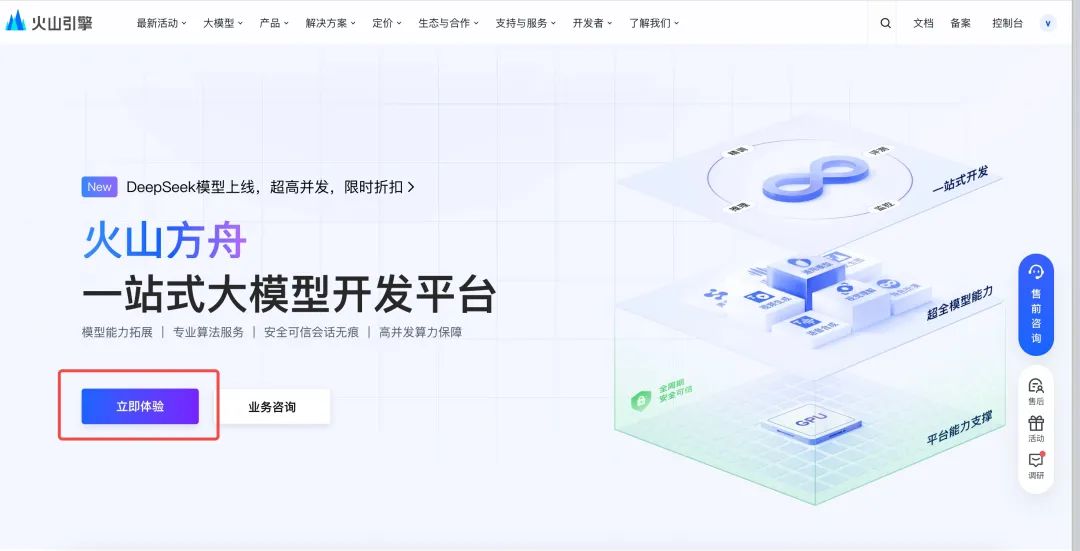
- Access and Login volcano engine Console, go to the Ark Modeling Platform.
- Select "Online Reasoning" in the left menu and click "Create Reasoning Access Point".
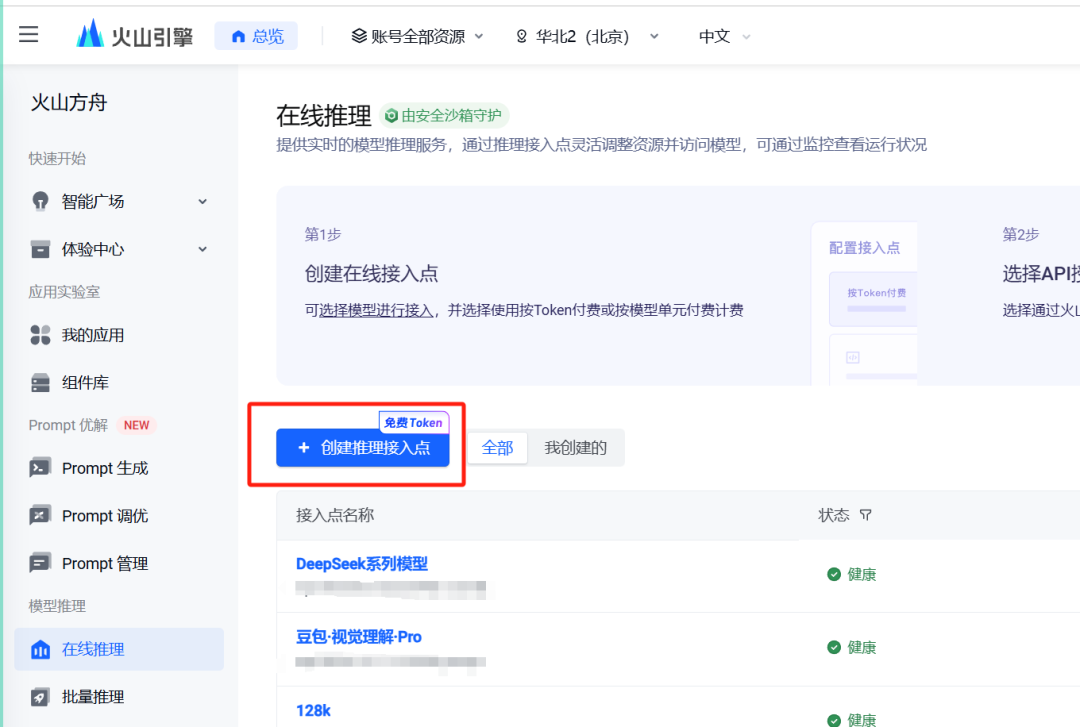
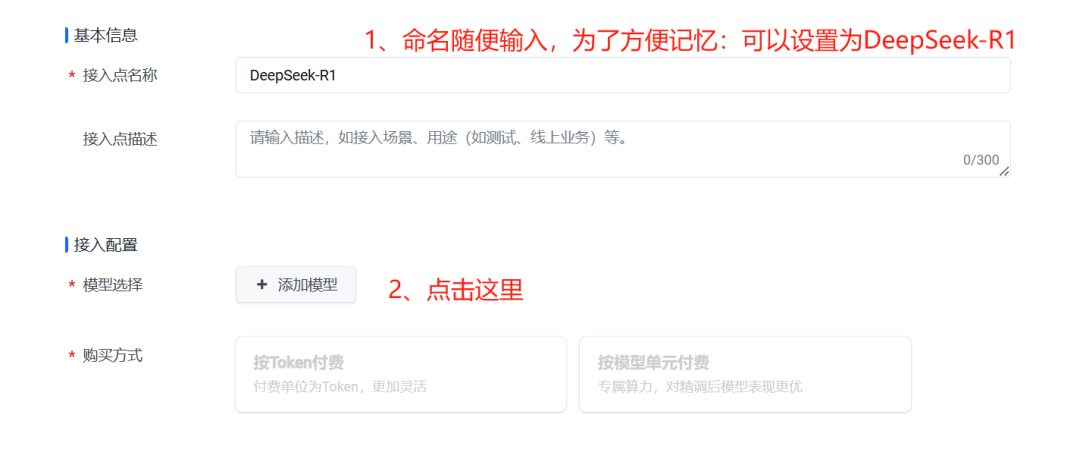
- Name the access point (e.g.
DeepSeek-R1) and select a base model such as thedeepseek-v2If you are prompted that the model is not available, please follow the instructions to complete the process. If you are prompted that the model is not open, follow the guidelines to complete the opening (free of charge).
- After successful creation, find the access point you just created in the list."Access Point ID" (Endpoint ID) which is required for subsequent configuration of the
model. Please copy and save it.

- Click on the "API Call" button to the right of the access point and select or create a
API Key。
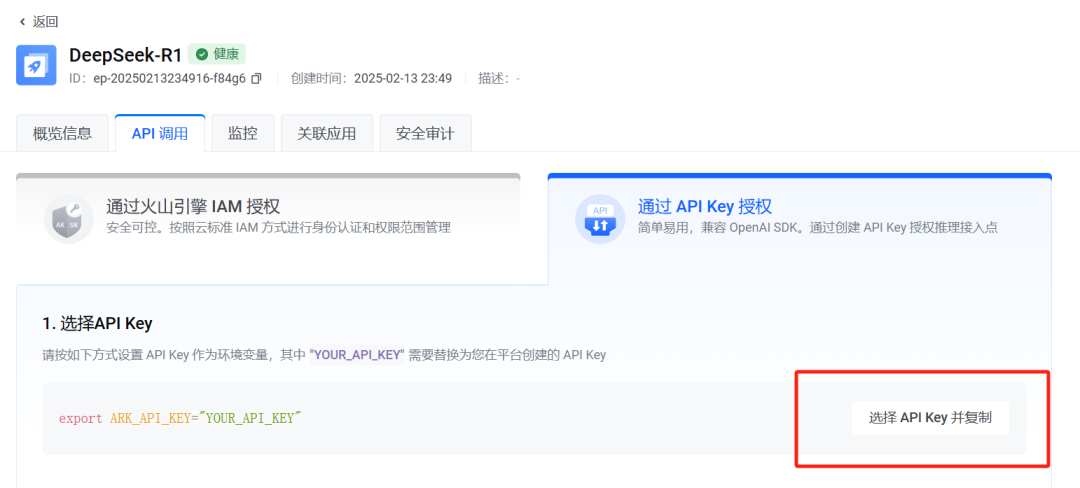
- make a copy of
Access Key ID和Secret Access Key。Secret Access KeyIt will only appear once, so be sure to save it immediately. Here'sSecret Access Keywhich is required for subsequent configurations of theapi_key。

4.2 Configuring Coze Studio Model Files
- Go back to the Pagoda panel and enter
/home/Coze/coze-studiodirectory, click Terminal at the top and execute the following command to make a copy of the model profile template.cp backend/conf/model/template/model_template_ark_doubao-seed-1.6.yaml backend/conf/model/ark_doubao-seed-1.6.yaml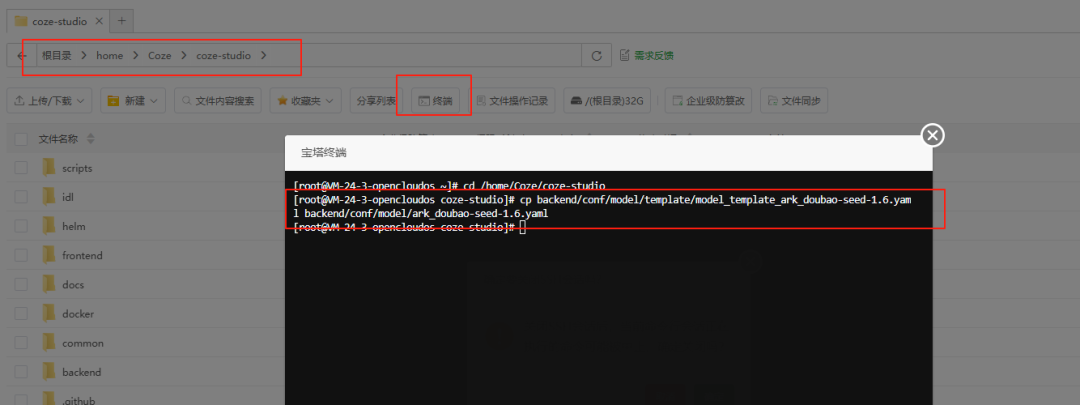
- Using Pagoda's file editor, open the just created
ark_doubao-seed-1.6.yamlDocumentation.Path:
/home/Coze/coze-studio/backend/conf/model/ark_doubao-seed-1.6.yaml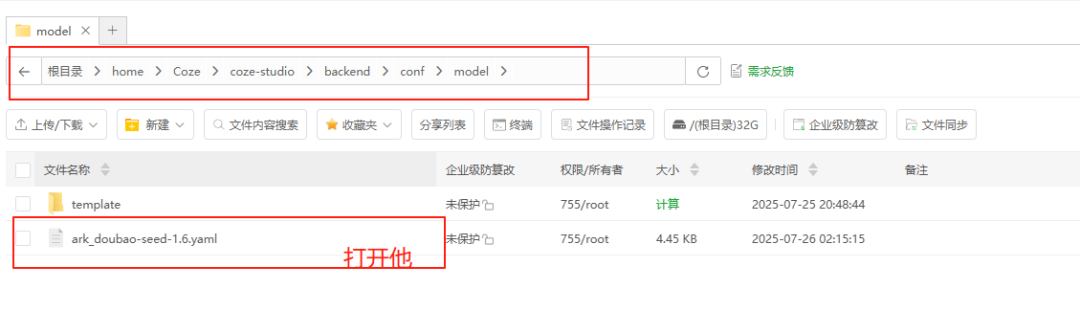
- Modify three fields in the file:
id: A unique identifier for the model, which must be a non-zero integer. For example, a value set to888. Please do not modify it after it goes live.meta.conn_config.api_key: Paste the Volcano Engine saved earlier Secret Access Key。meta.conn_config.model: Paste the Volcano Engine saved earlier Access Point ID (Endpoint ID).
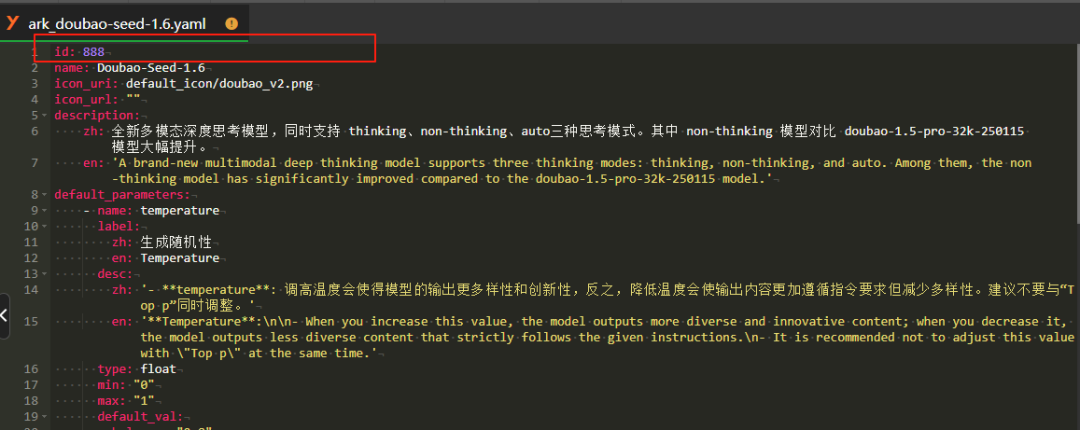

- After confirming that the changes are correct, save the file.
V. Launching and accessing Coze Studio
- return to
/home/Coze/coze-studiodirectory and open the terminal again. Execute the following commands in order to enter thedockerdirectory, create environment variable files, and start all services.cd docker cp .env.example .env docker compose --profile '*' up -d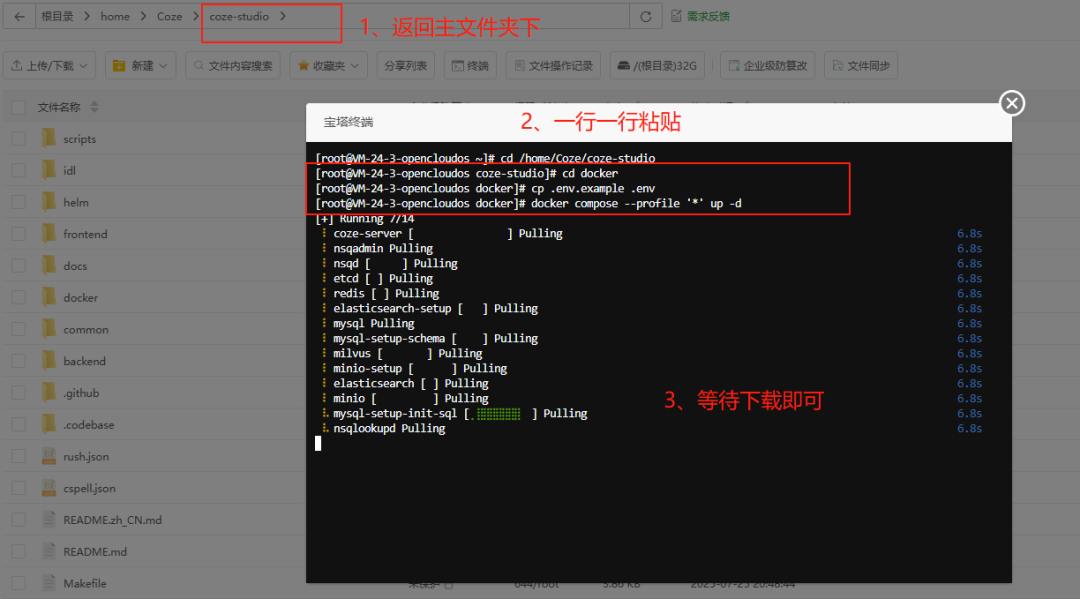
- The first startup will take a while to pull and build multiple Docker images, so please be patient. When the terminal outputs
Container coze-server Startedor similar success message and no more new logs are rolled over, the service has started successfully. - The deployed
Coze Studio. The access address is:
http://<你的服务器公网IP>:9999将
<你的服务器公网IP>Replace with the IP address displayed in the upper left corner of the Pagoda panel.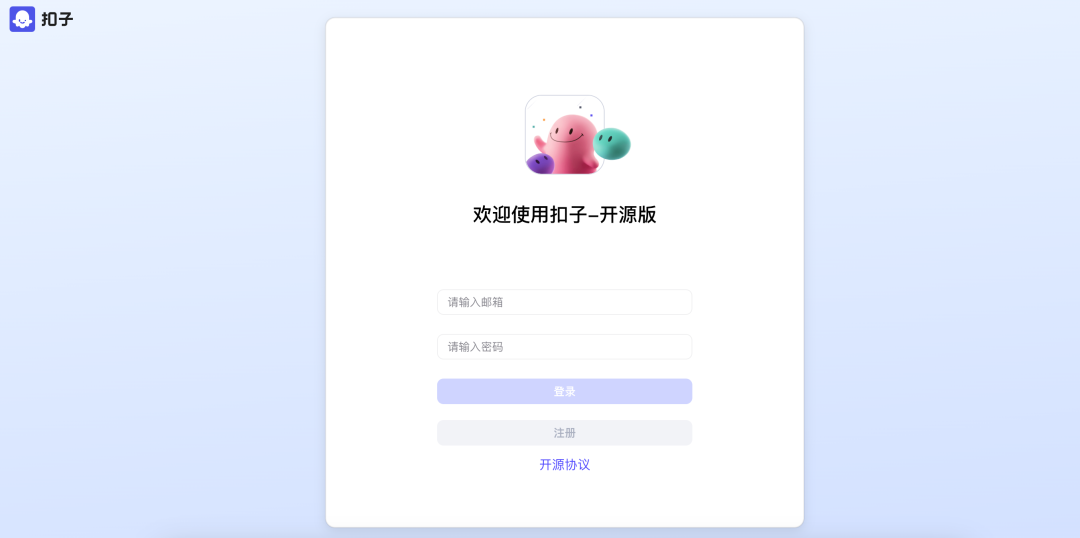
Once the page opens, follow the prompts to register your first administrator account to start exploring and building your AI intelligences in your local environment.