With [New release of Canvas Editor], you now have more granular control over the modification, adjustment and refinement of your images. This guide will take you through a comprehensive look at the features of the Canvas Editor, including new and updated features and tools, so you can take full advantage of this powerful editing suite.
Now that you're familiar with the new features of the Canvas Editor, it's time to get hands-on. Let's dive into its usage.
Upload a picture:
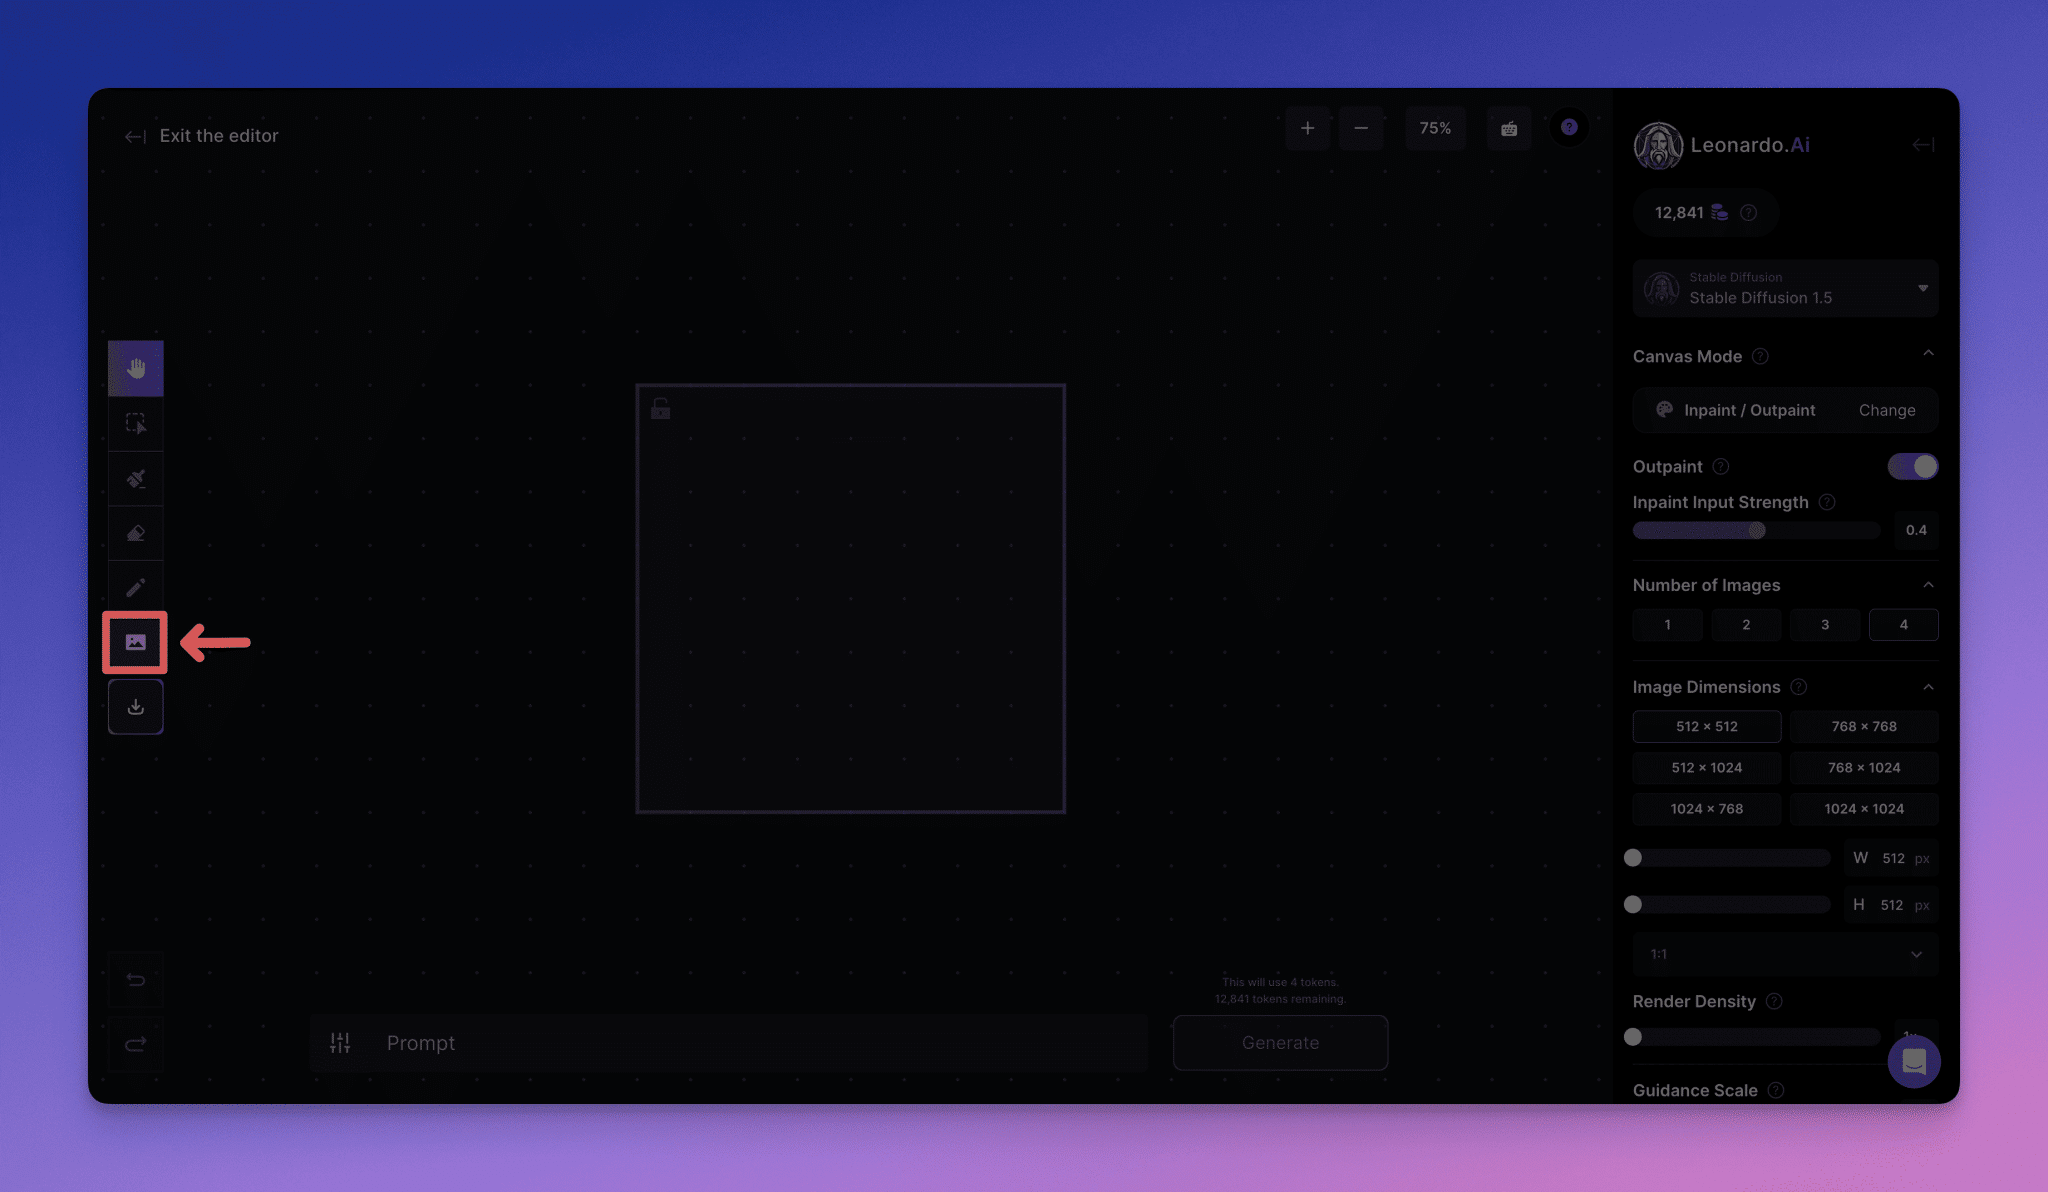
To start using the Canvas Editor, you first need to upload an image. The procedure is as follows:
1. Click on the left toolbar"Upload a picture."Button.
2. Select a picture. (This can be a picture from your computer, a previously generated picture or a picture from a community dynamic)
3. The image will be displayed on the canvas and editing can begin next!
Selection/movement and shortcut operations
To move elements around on the canvas, including the generated box and the newly generated image, use the toolbar's"Choose."(arrow) tool. (Note: the canvas editor only generates content within the generated box and you need to make sure that the lock in the upper left corner is on)
1. Click the **"Select "** button on the toolbar and then click on the element you want to move.
You can then drag the element to the position you want.
2. You can use"Panning."function moves the view on the canvas.
3. You can also use"Zoom in."cap (a poem)"Downsizing."功能,通过’+’按钮放大,’-‘按钮缩小。(也可以通过鼠标滚轮或触控板进行缩放)。此外,你还可以选择+ -按钮旁边的预设缩放级别。

4. Finally, the keyboard button at the top of the screen is **"Shortcuts "**, which provides PC and Mac shortcuts for easier operation.
Drawing a Mask Mask or Erasing an Image

You can easily access the toolbar with the"Drawing Masks"maybe"Erase."button to modify the image.
- shieldsAn area that retains some of the underlying theme and style is perfect for making minor adjustments.
- eraseOne area can be used to completely remove unwanted parts or to prepare for replacement.
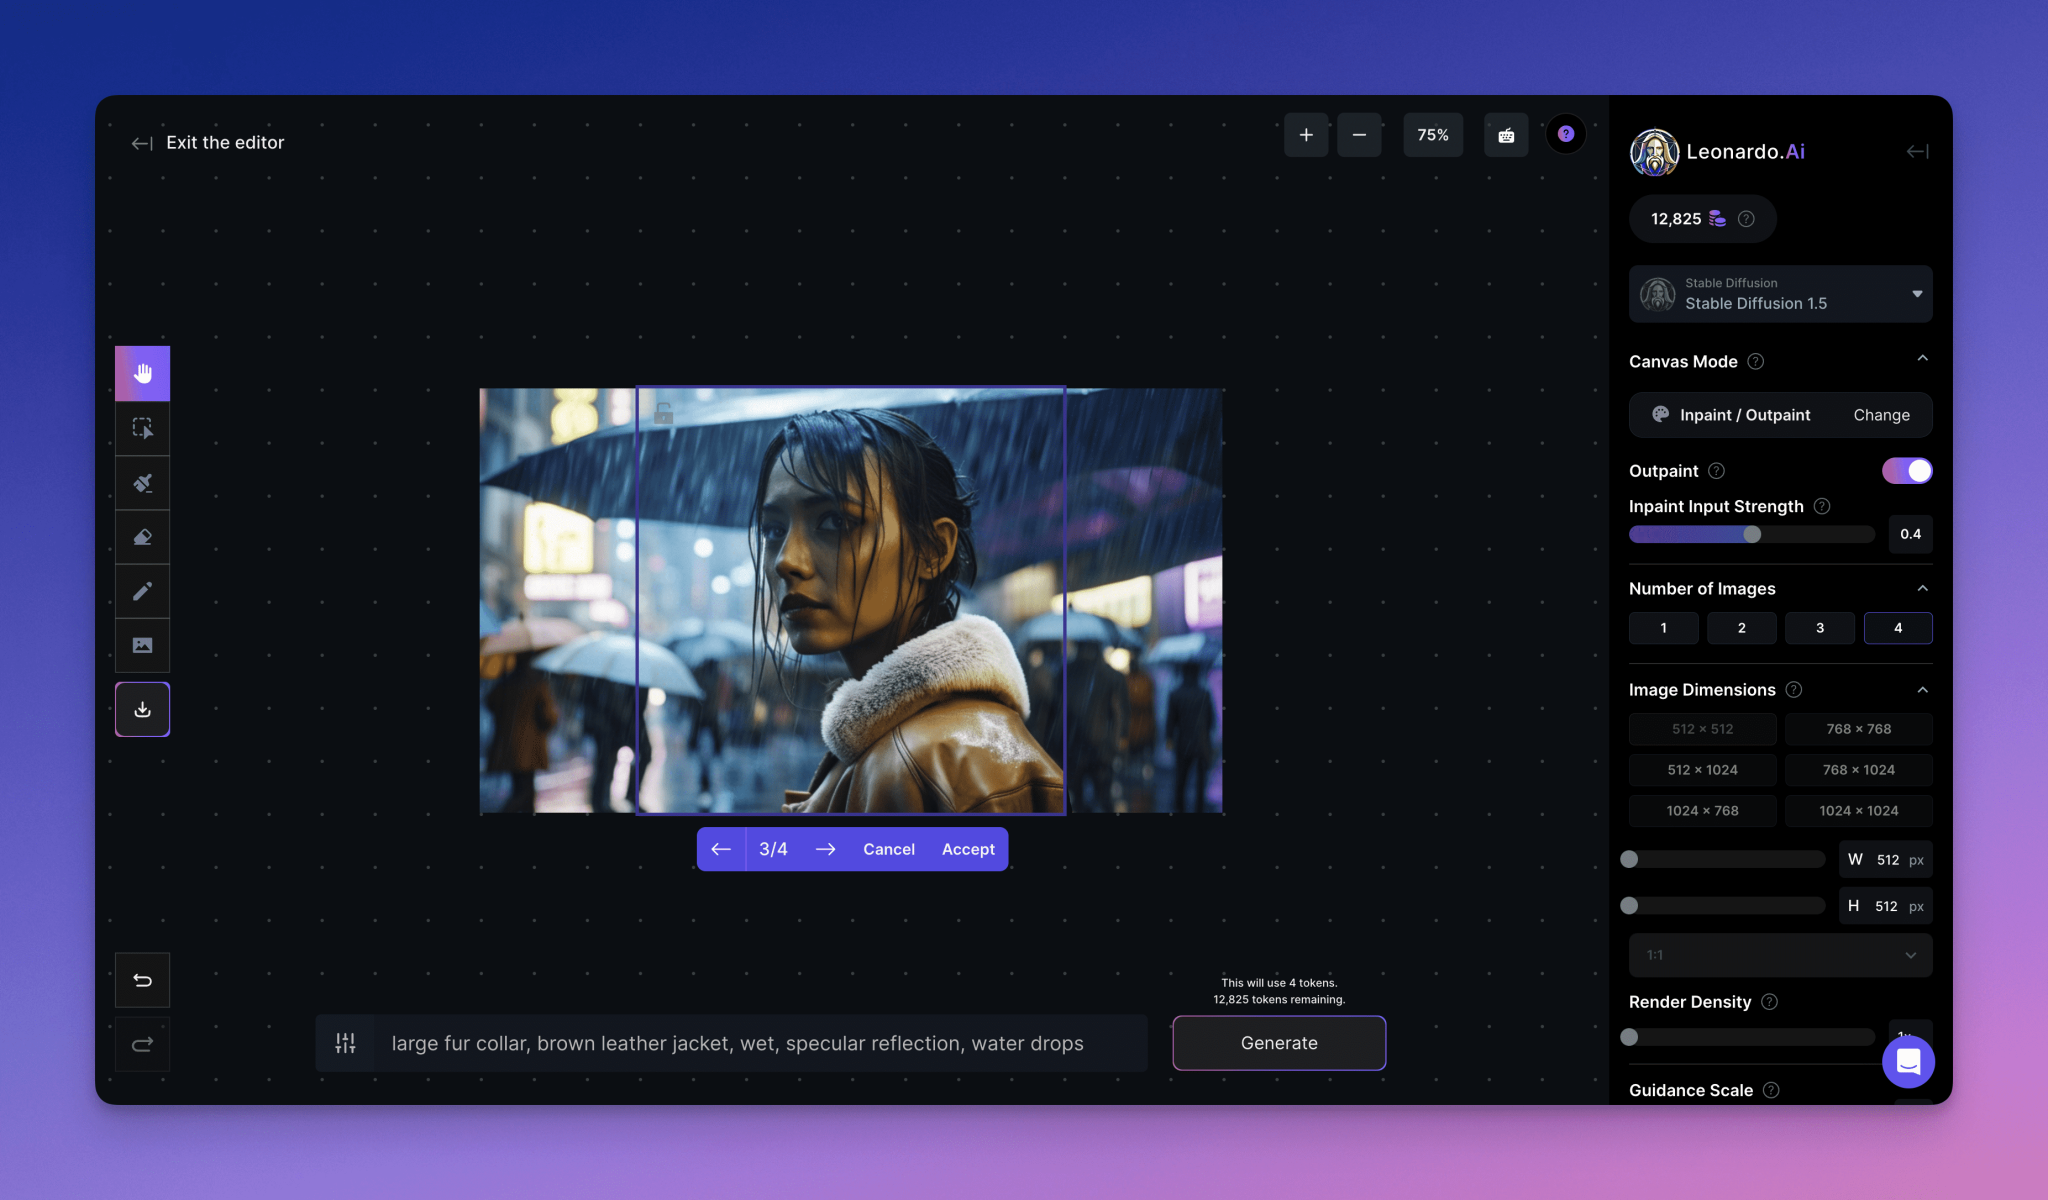
Once you've made the changes you want, simply type a prompt in the text box at the bottom of the screen to regenerate the area in the Generate box.
Details:
Draw Mask
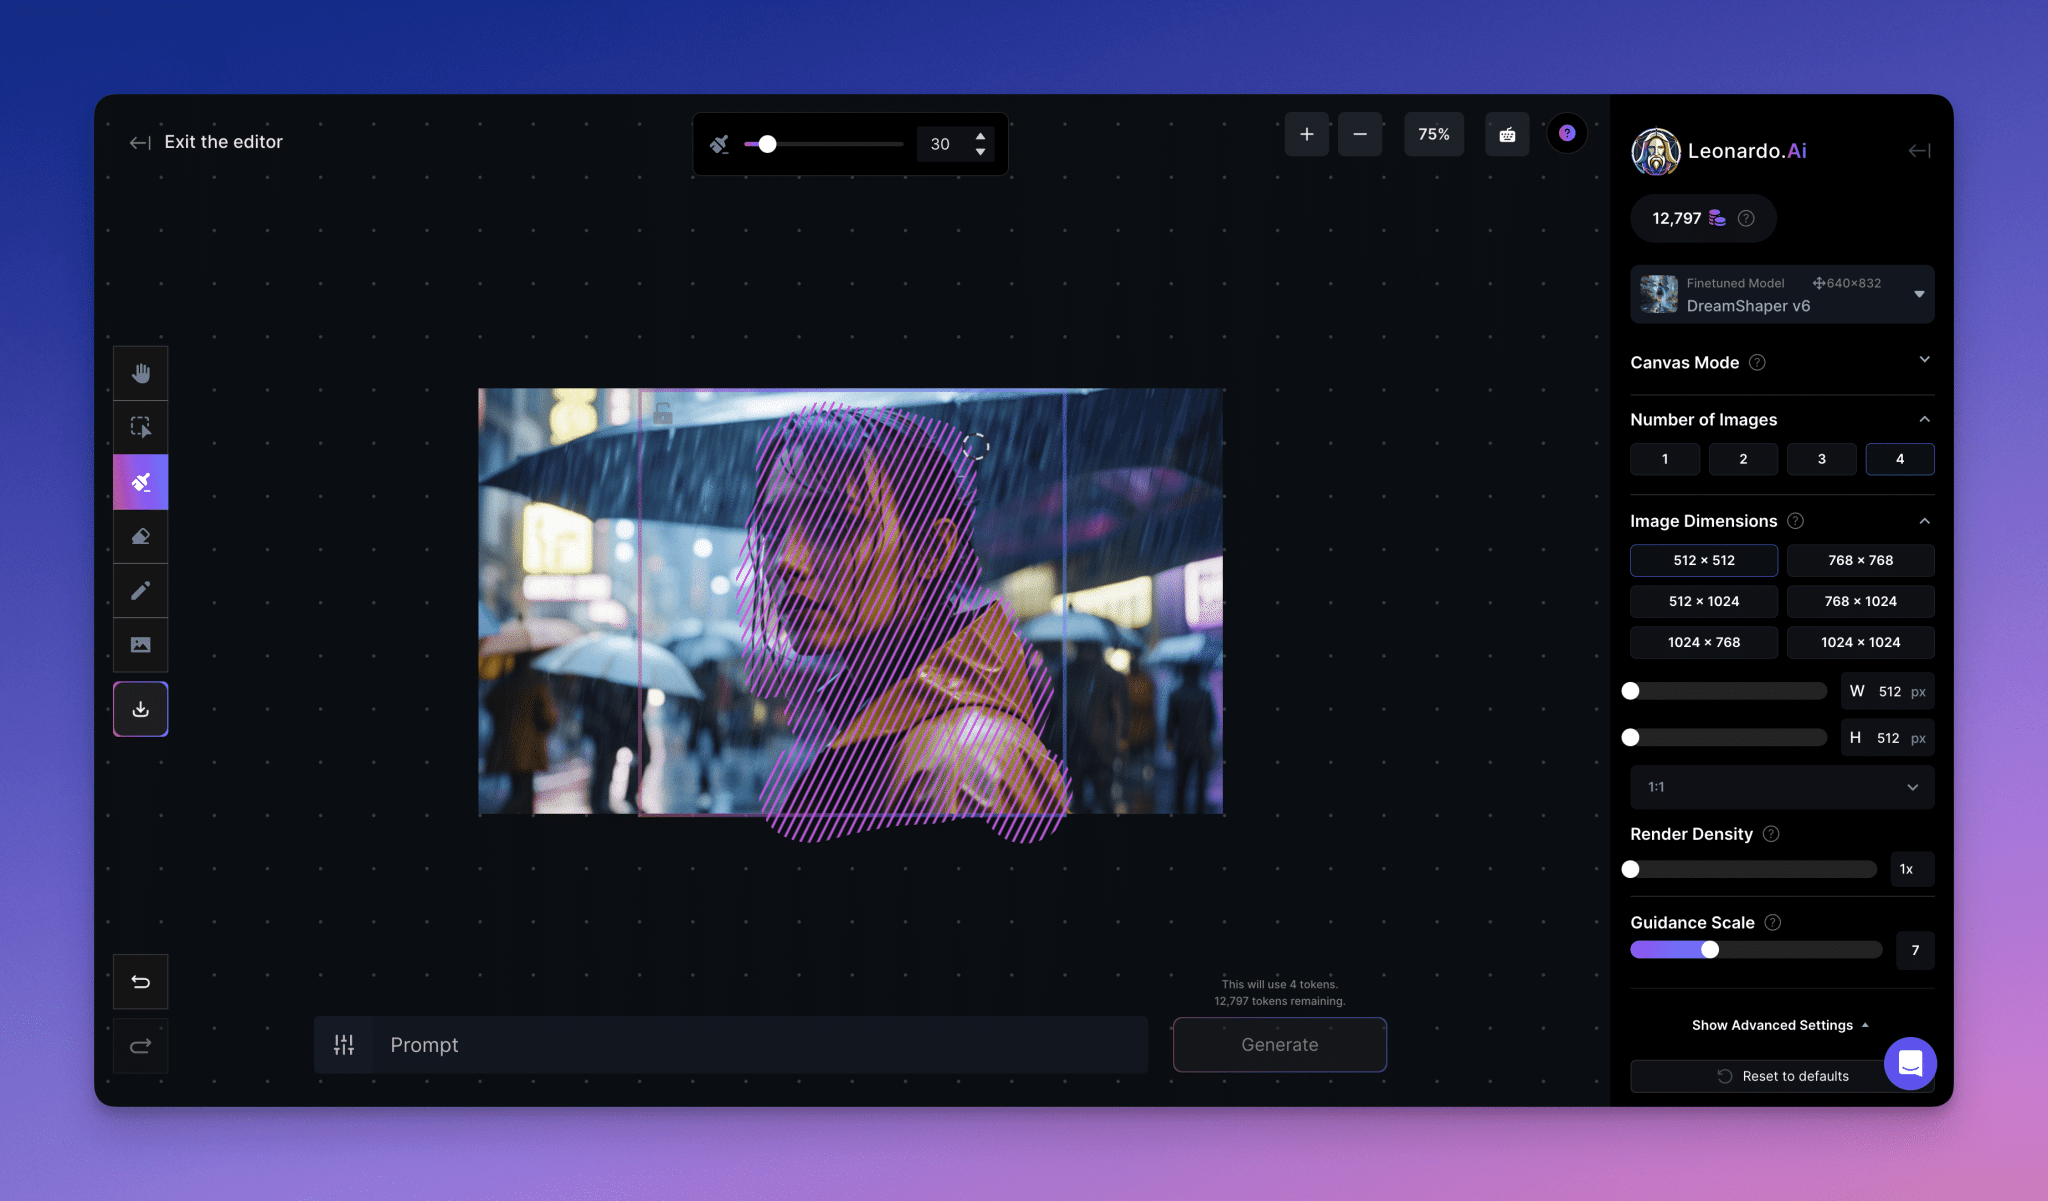
Once selected, use the pointer to draw a mask over the area of the picture you want to change or fine tune. Once the mask is complete, you can enter a hint for the picture, such as "man in sunglasses", and then regenerate the masked area. This feature allows you to make specific changes to a picture without affecting the rest of the picture, while preserving some of the picture information under the mask, such as color, theme and style.
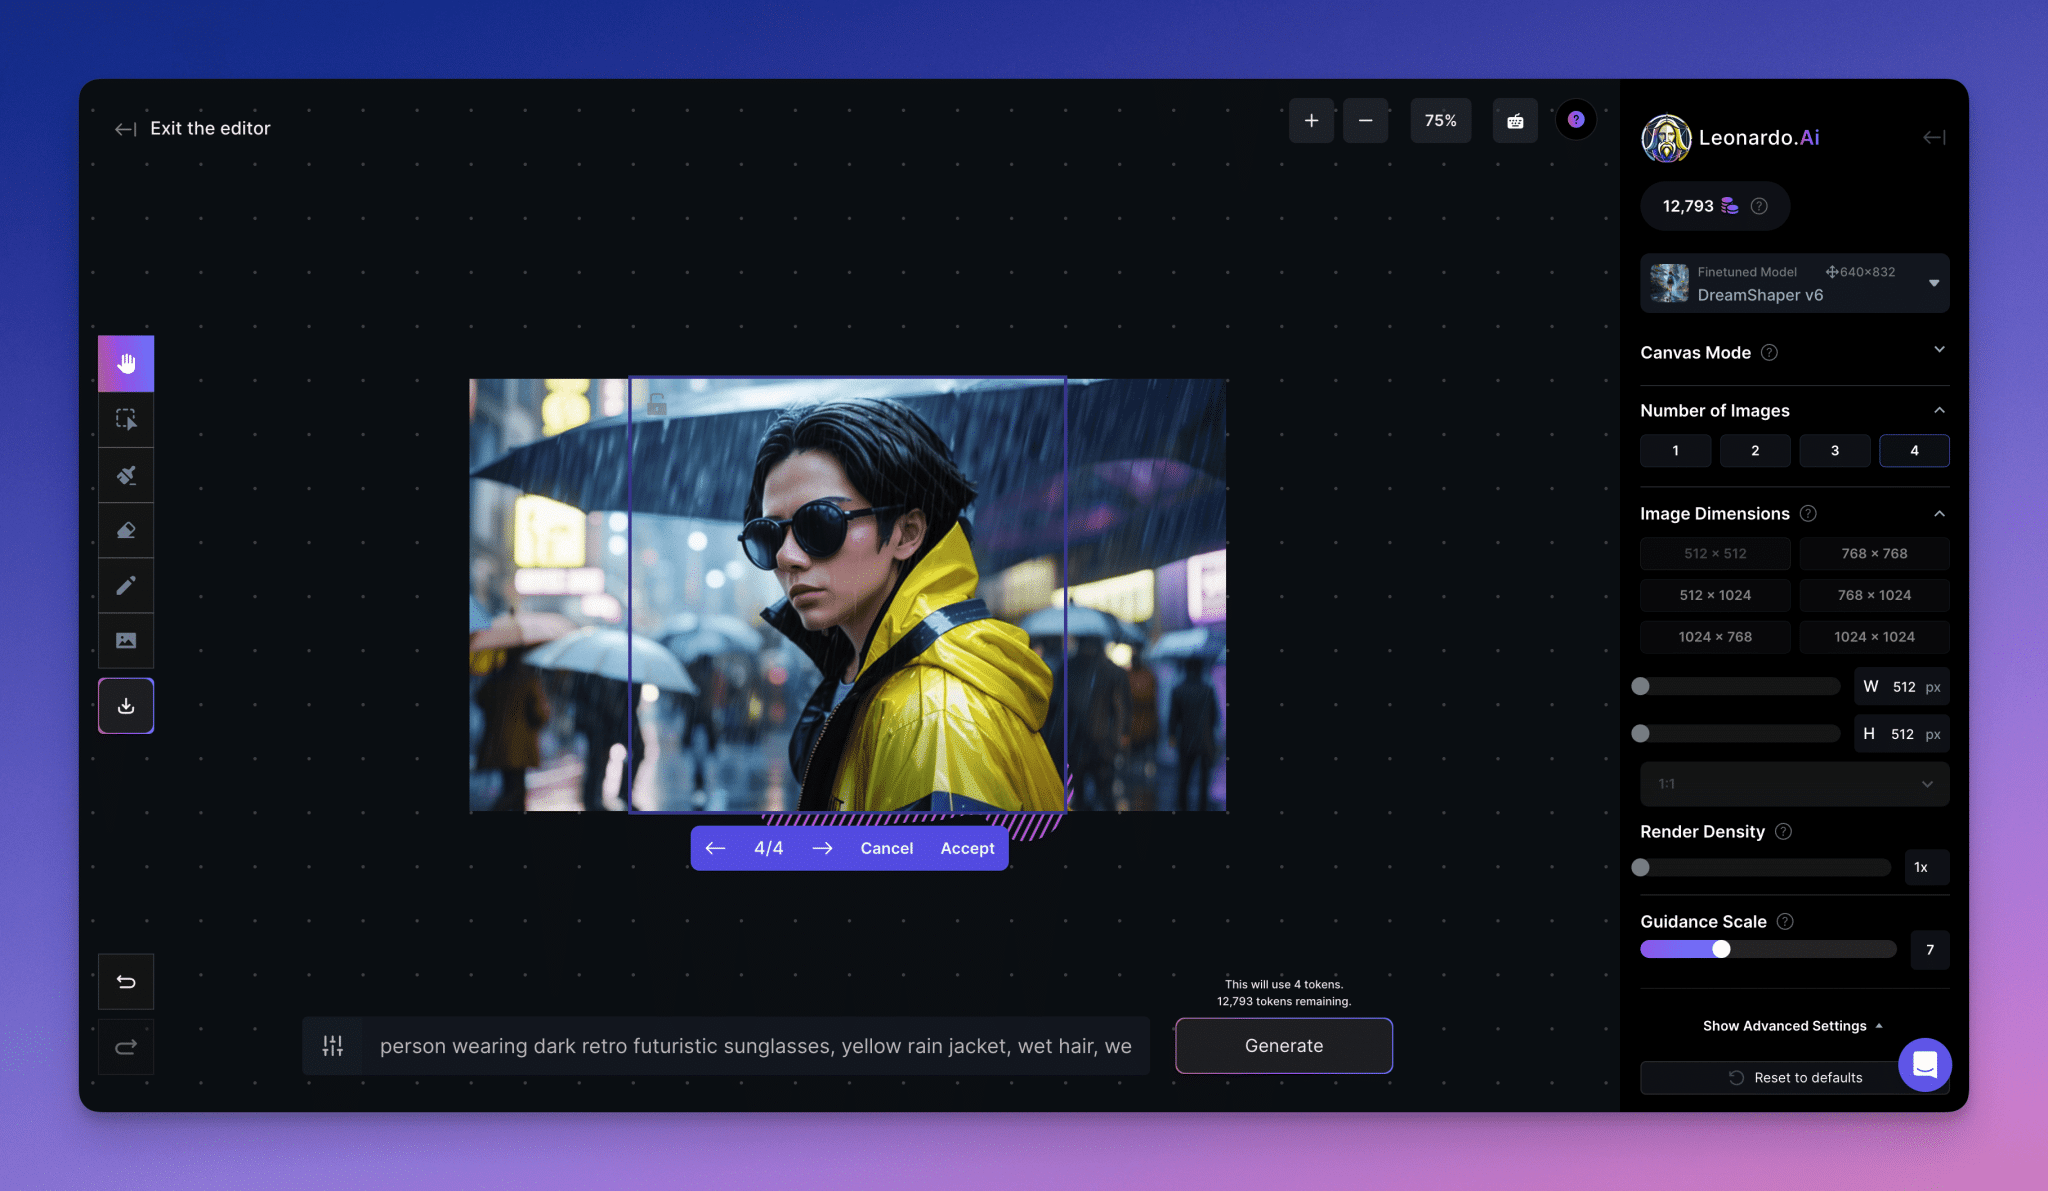
Erase
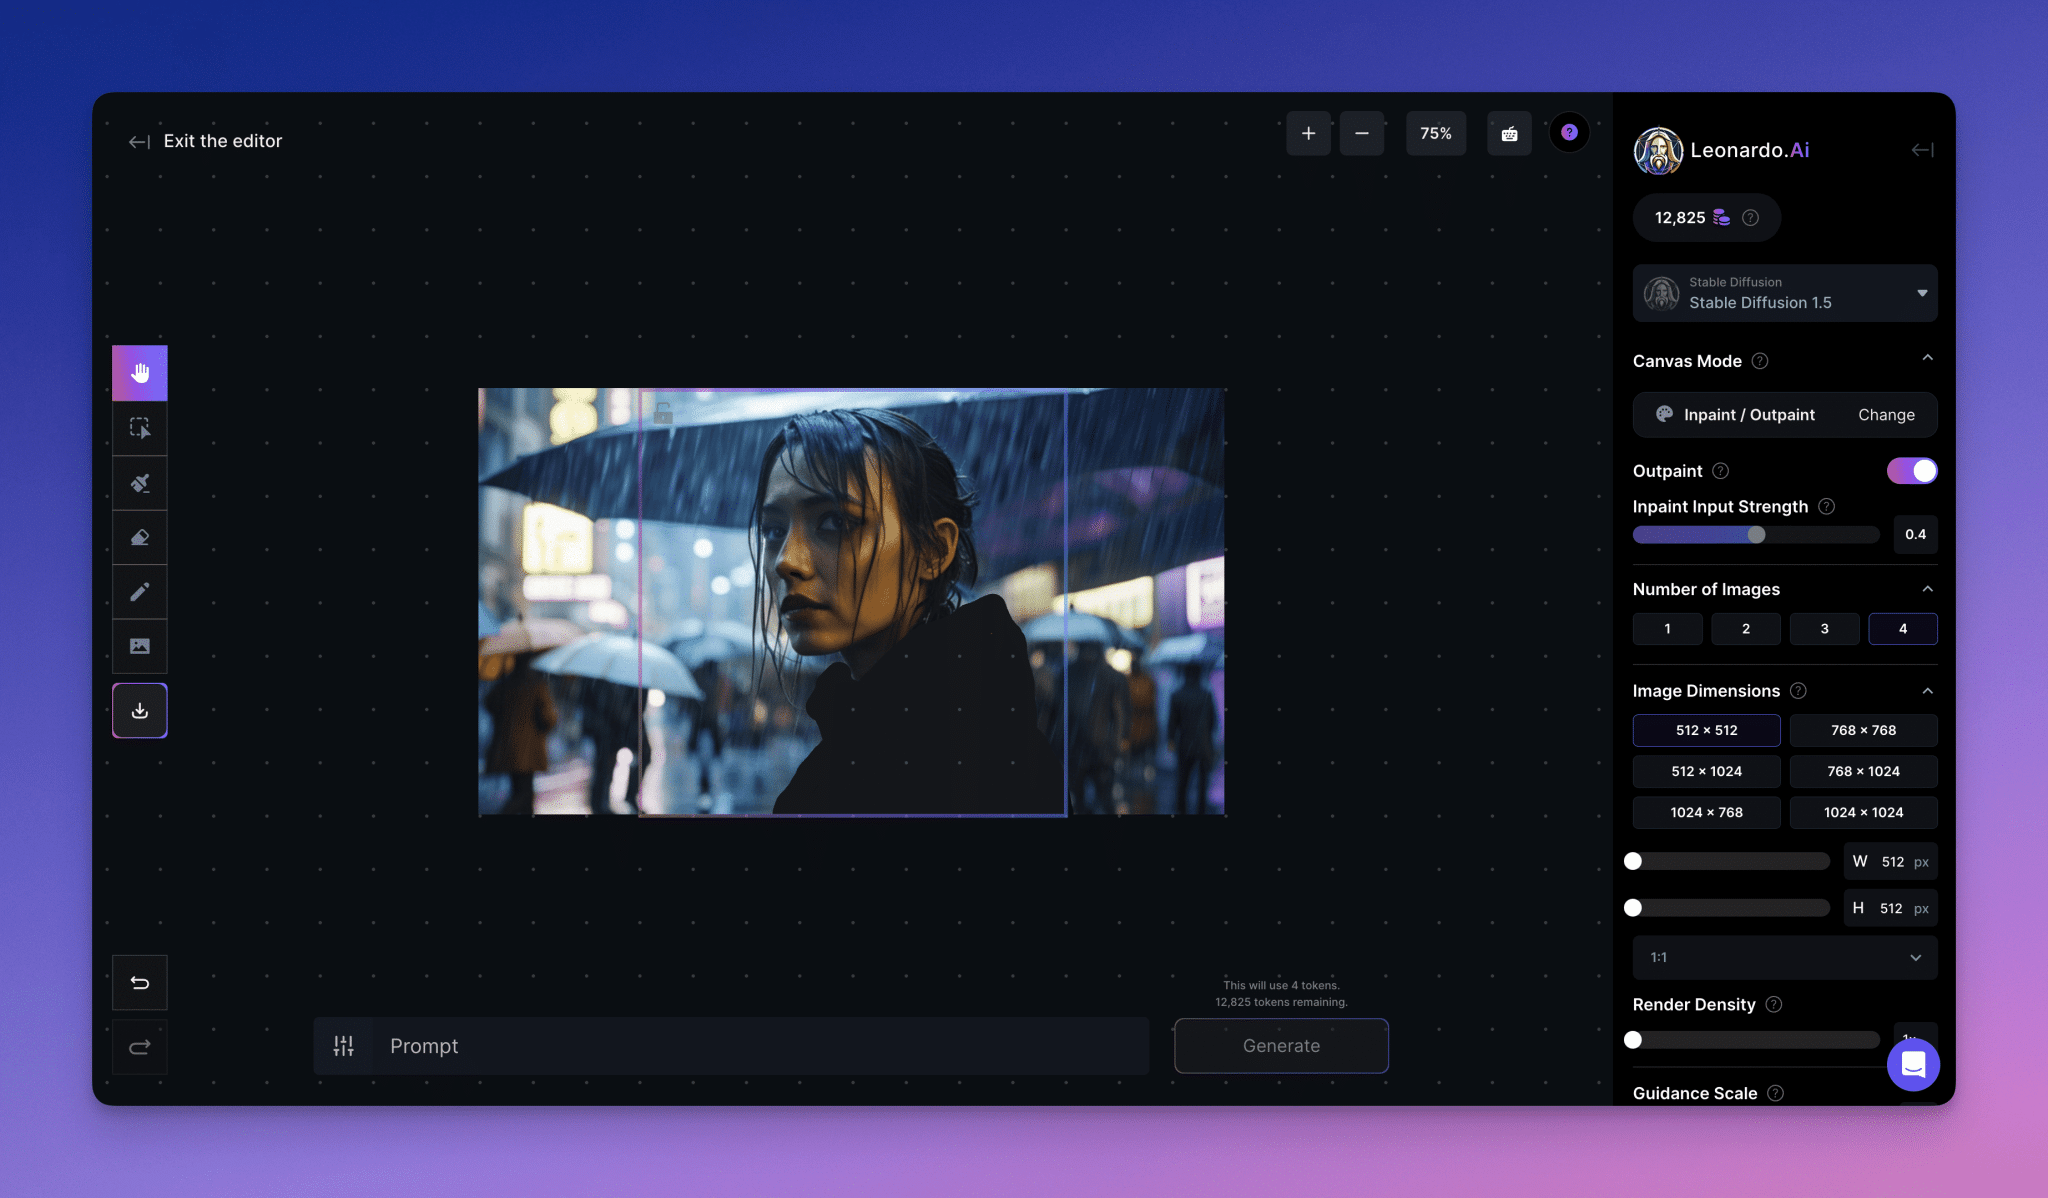
Once selected, use the pointer to highlight the area you want to erase. Afterwards you can enter a picture hint and regenerate the erased area. This feature is useful when you want to remove unwanted elements from a picture, and is also an alternative option to masking if the changes you want to make are strongly influenced by the original picture.
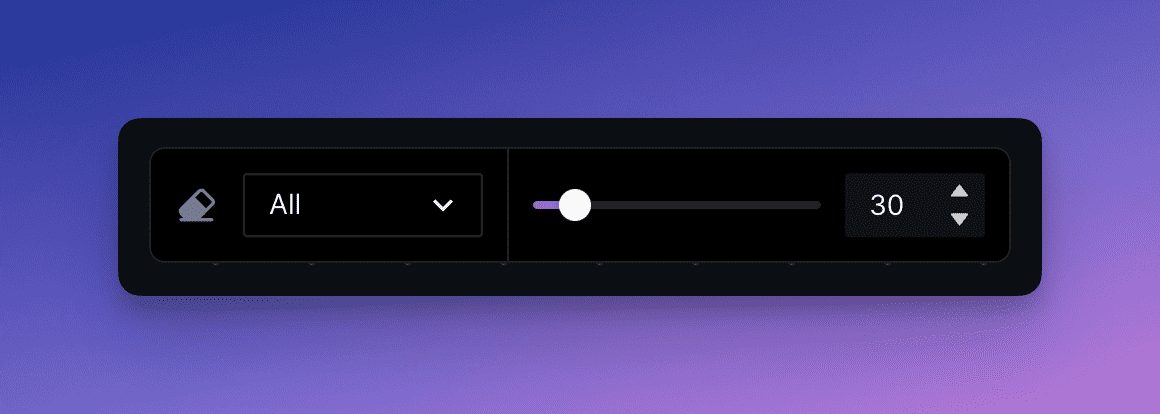
Note that you can select different erase modes: all, picture, sketch, or mask to determine what will be erased.
Download Artworks
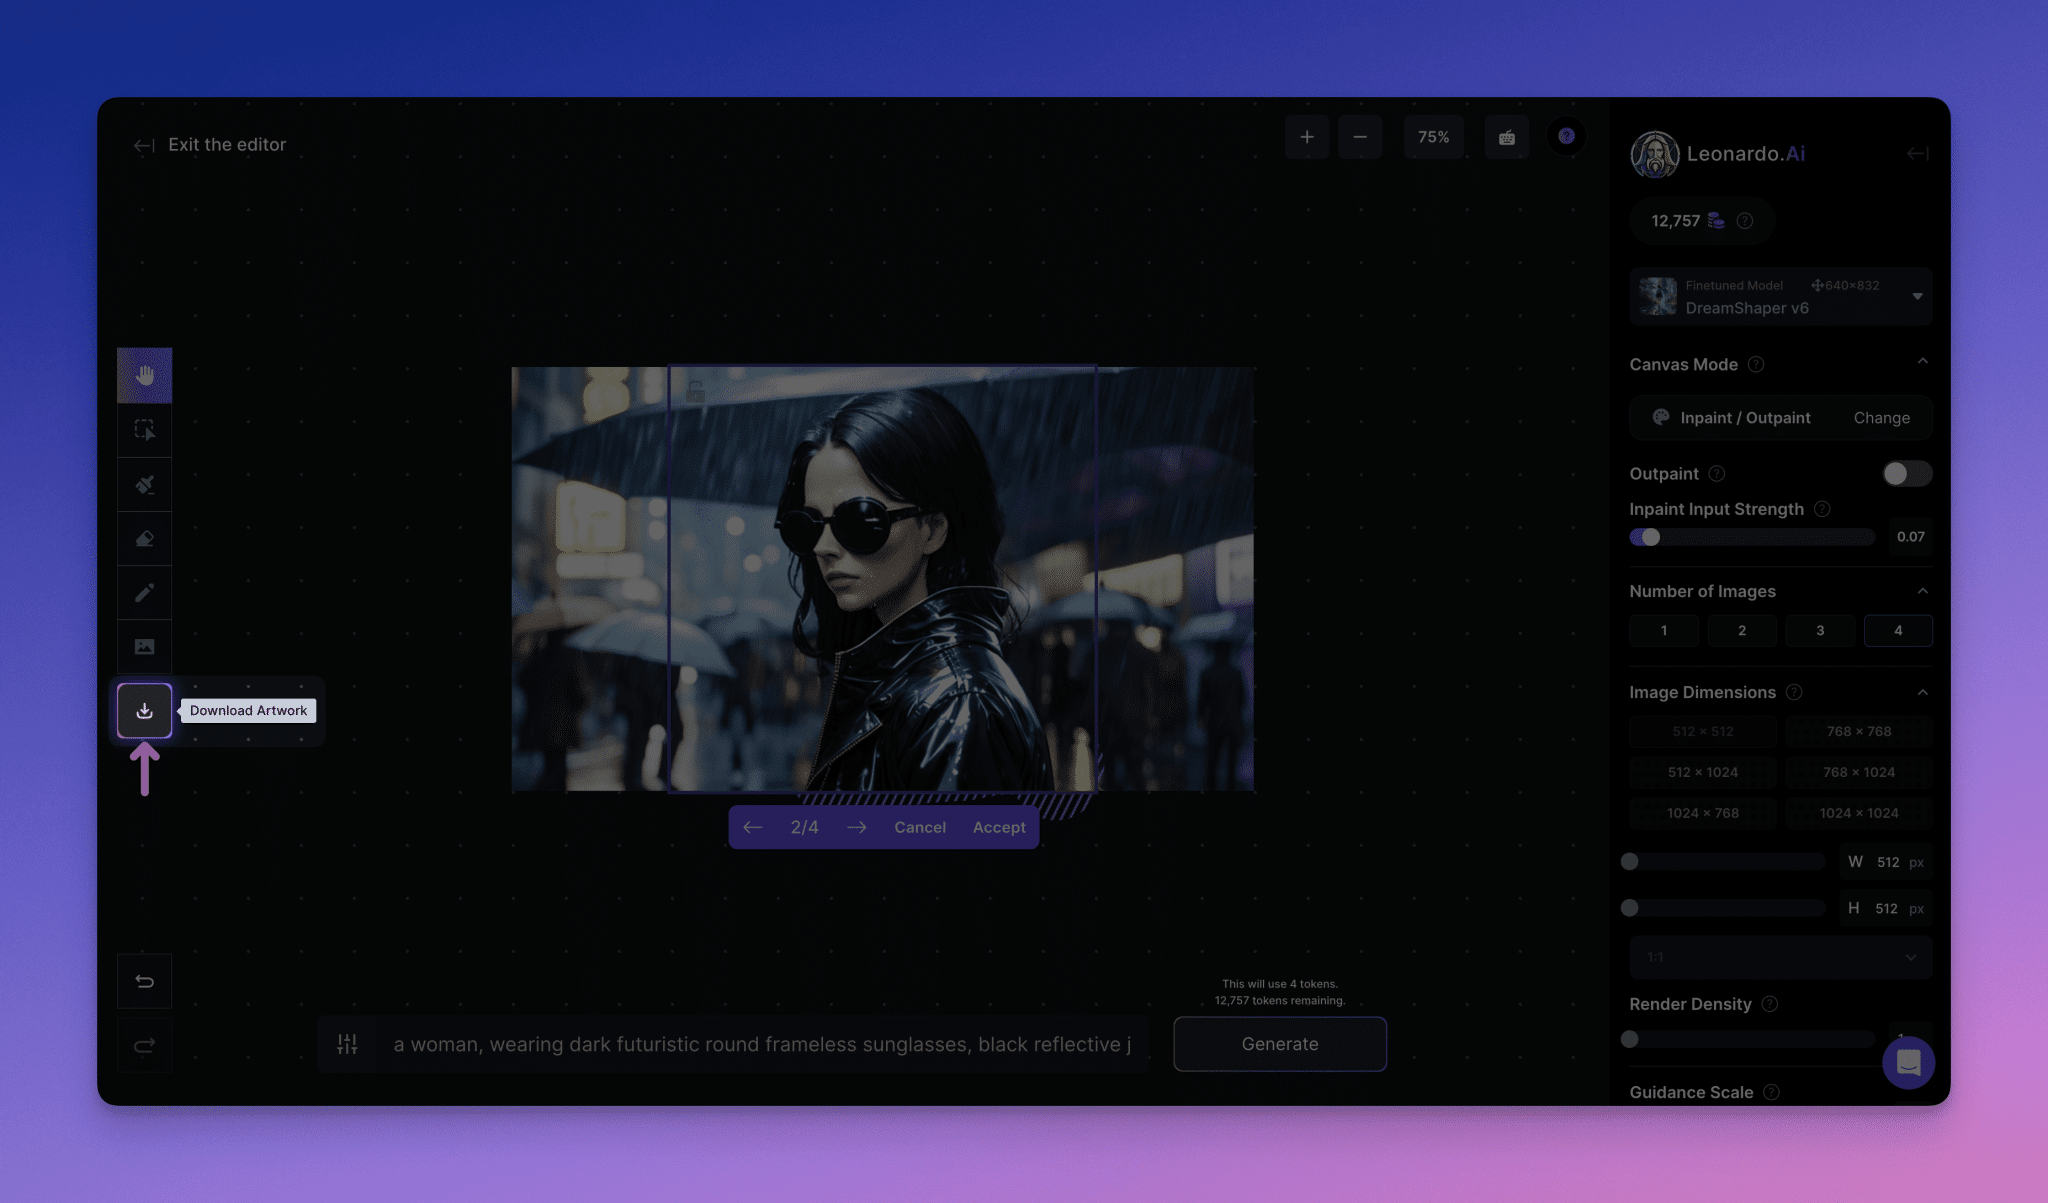
When you are satisfied with the image you have created, click the "Download Artwork" button on the toolbar to save the image to your computer.
Undo & Redo
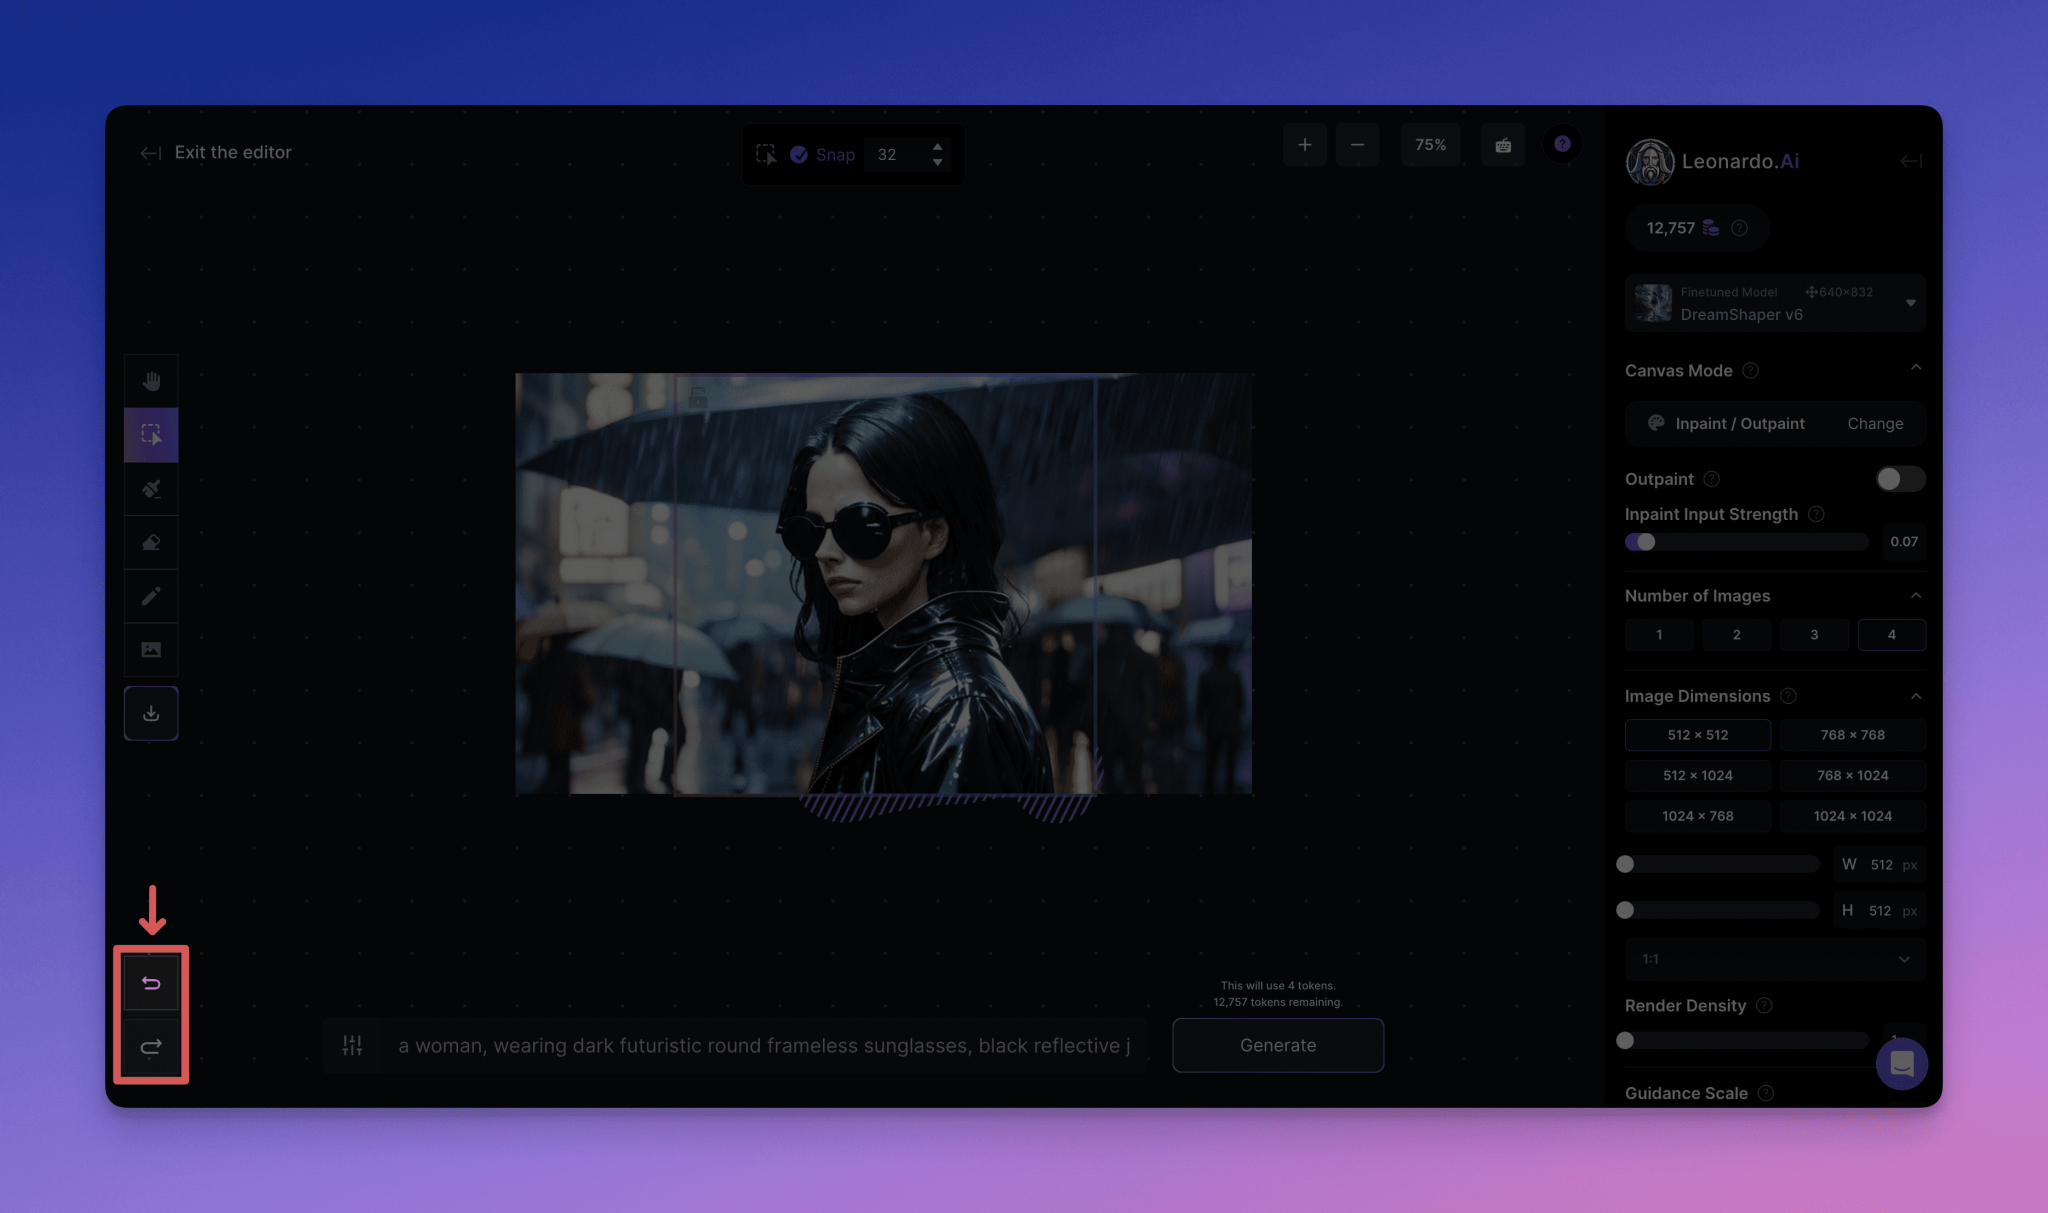
If you make a mistake or want to undo an action, you can use the Undo and Redo buttons in the lower left corner of the canvas.
Focus Mode

Focus mode is a simplified version of image restoration. To use Focus Mode, simply select the area you wish to repair with the lasso tool, enter the prompt, and generate.
To enter Focus Mode, select the image with the Selection Tool and then click the Focus Mode button in the upper right corner of the canvas.
To return to the default mode of the canvas editor, click Infinite Mode.
(Note: Before doing so, you may need to accept or cancel any pending changes)
Focus Mode Setting
- Fine-tuning the model:Choose your preferred fine adjustment model. The closer the model is to the style of the image, the better the results obtained will blend into the original image.
- Repair Strength:Adjusting the Restoration Intensity affects how much the underlying image is considered in the restoration process. Higher values may result in better cues to follow, but may ignore the light and style of the original image. Recommended values are between 0.7 and 0.9.
- Number of images:This determines the number of changes that will be generated. Note that this affects the token cost.
- Advanced Settings:A Fixed Seed option is provided where you can enter a seed value for use. For advanced users, there is also the option to select the type of scheduler used for generation.
Using the Control Panel
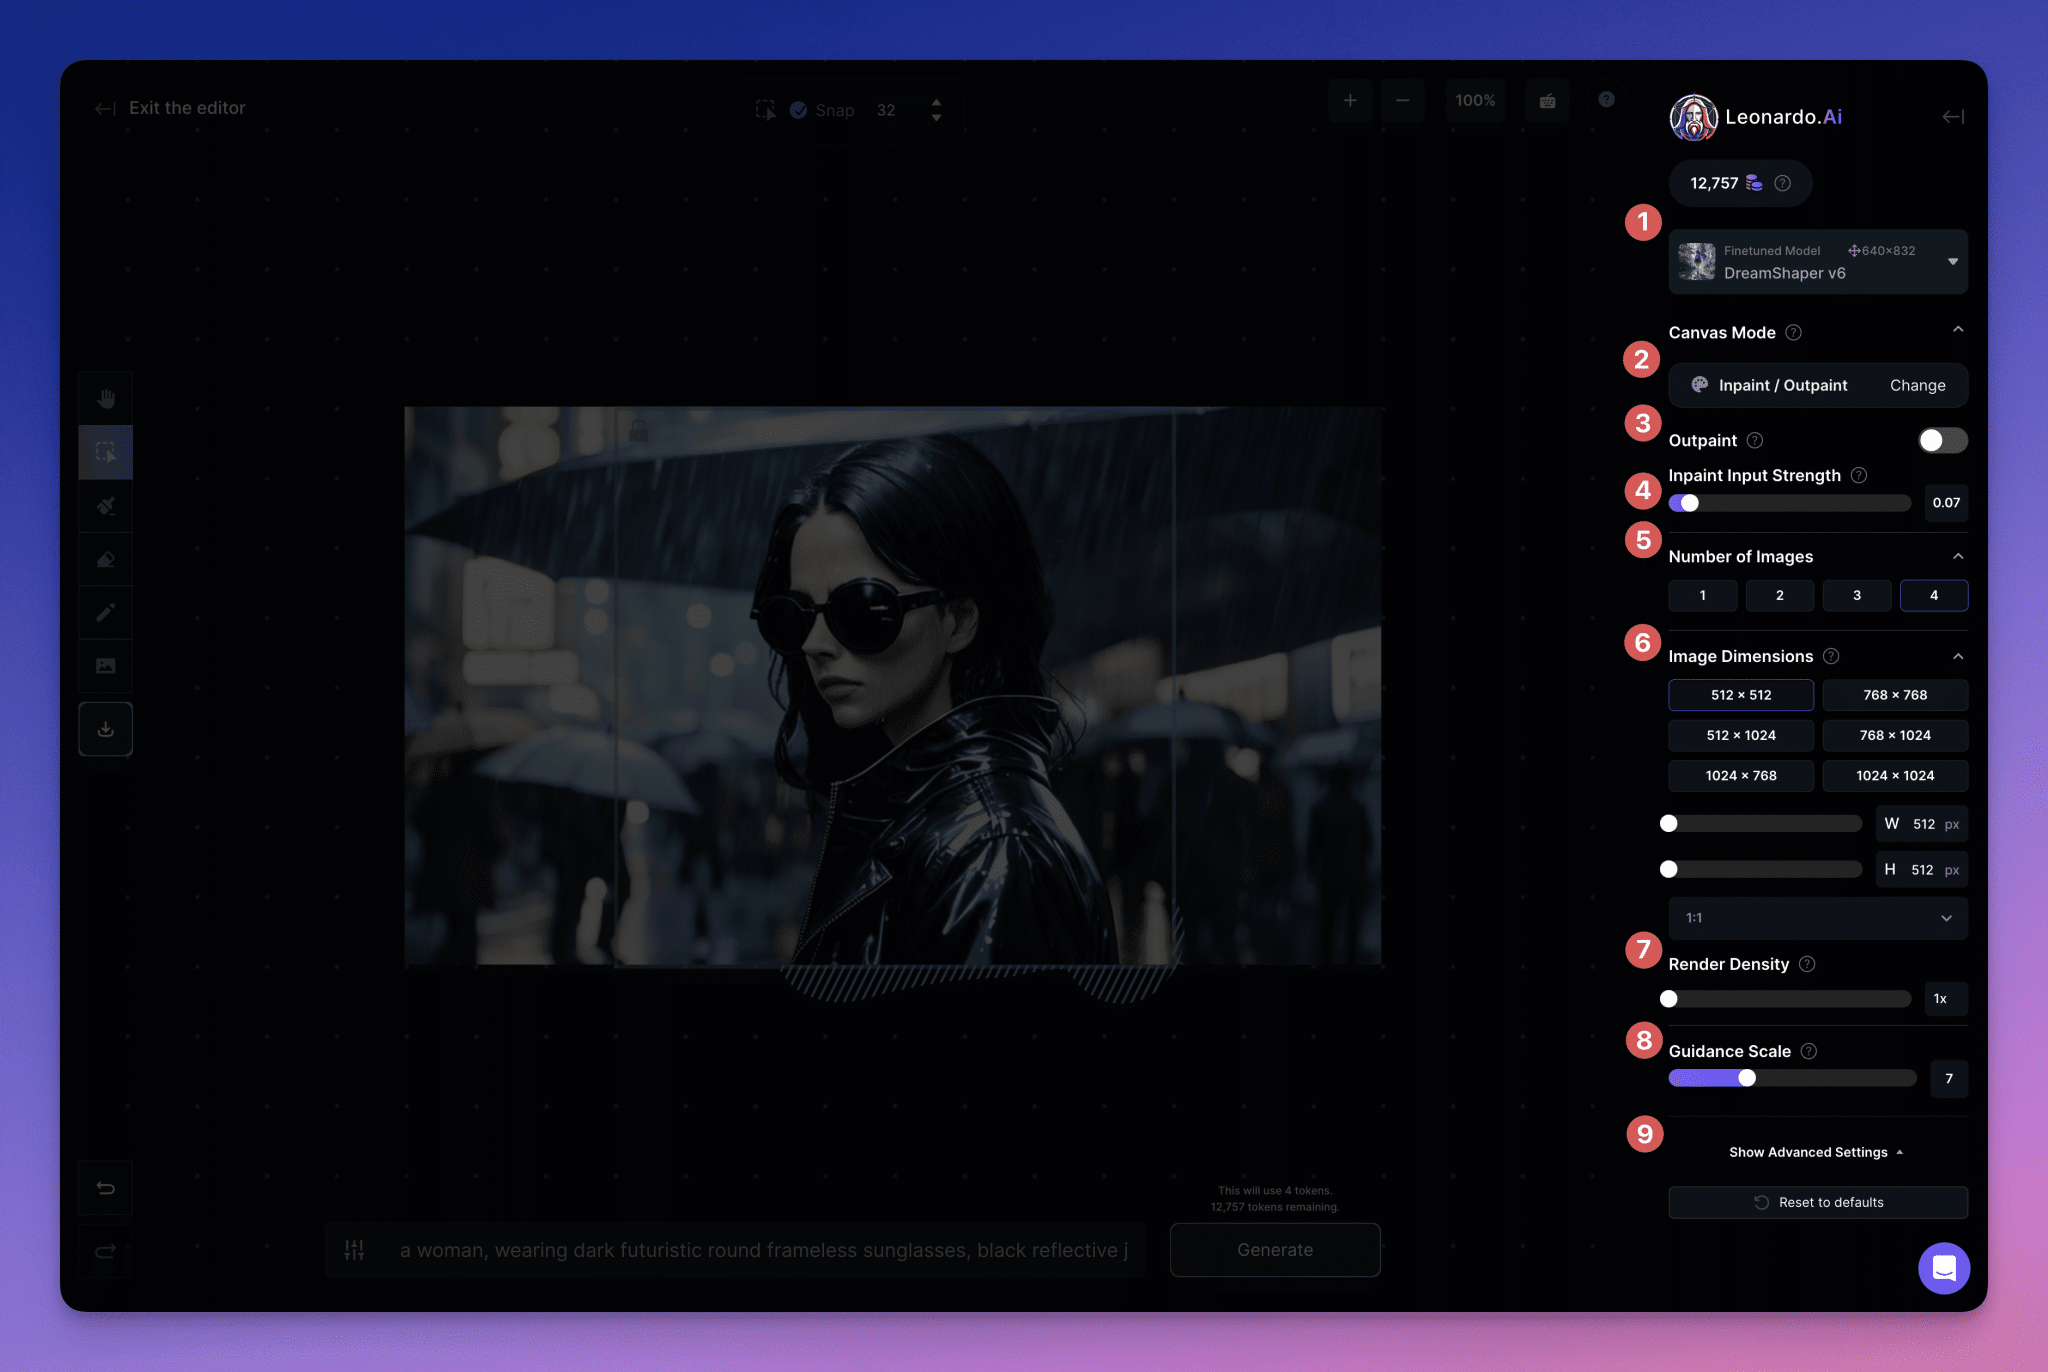
on the right side of the canvas"Control Panel"is the main area where you can access a variety of tools to support your editing efforts. These include:
1. Model:The base model you will use to edit the image. (It is a good idea to use the same model as the original image whenever possible)
2. Canvas mode:A wide variety of new and upgraded mode options are available to you, such as Sketch2Img.
3. Extended Drawing:打开此选项将确保级别设置与扩展绘制选项很好地配合 – 这些选项比修复绘制的范围更广。(Toggling this option [on] disables input strength)
4. Fix input strength:Adjusts how closely the newly generated content fits the underlying image.
5. Number of images:This is the number of alternative regenerations the model will create, and you can use the arrow buttons to scroll through to see any that fit best (or cancel and retry if none fit).
6. Image Size:Allows you to change the resolution of the generated content (especially important to note when generating larger areas).
7. Rendering Density:Decrease the size of the generated context and increase the pixel density.
8. Guidance ratios:您的文本提示的权重有多强。(这里很容易设置得太高,但这实际上可能会造成问题 – 我们建议设置为7-9)
9. Advanced Settings:Here you can enter the seed, set it to fixed (constant) or change the scheduler used (subscription plan users only).
Tips and Generation

To generate new content, add the"Tip."Enter your prompt in the text field and click the"Generate"Button. Tips for entering good tips: Be specific, use complete sentences, and describe all the elements you want to include in the generation box. You can also use the Negative Tips button to tell the AI model what not to generate, such as "extra limbs" and "nudity".
Text to Image
当选择时,您将能够像在平台的标准图像生成部分一样进行提示 – 尽管功能稍微简化,以实现最佳的画布性能。只需使用屏幕底部的提示选项,在生成框内创建一个全新的图像(忽略之前的上下文)。
Image to Image
To use this tool, select it from the Canvas Mode selection area and then move the generator box to the desired location. From here, you can re-prompt using the input fields at the bottom of the screen.
根据生成框的大小,提示的清晰度 – 及其权重 – 变化可能是微妙的或重大的,允许进行非常广泛的再生选项,这些选项可以完全改变您的图像,或者以微小但有意义的方式增强它们。
Sketch to Image
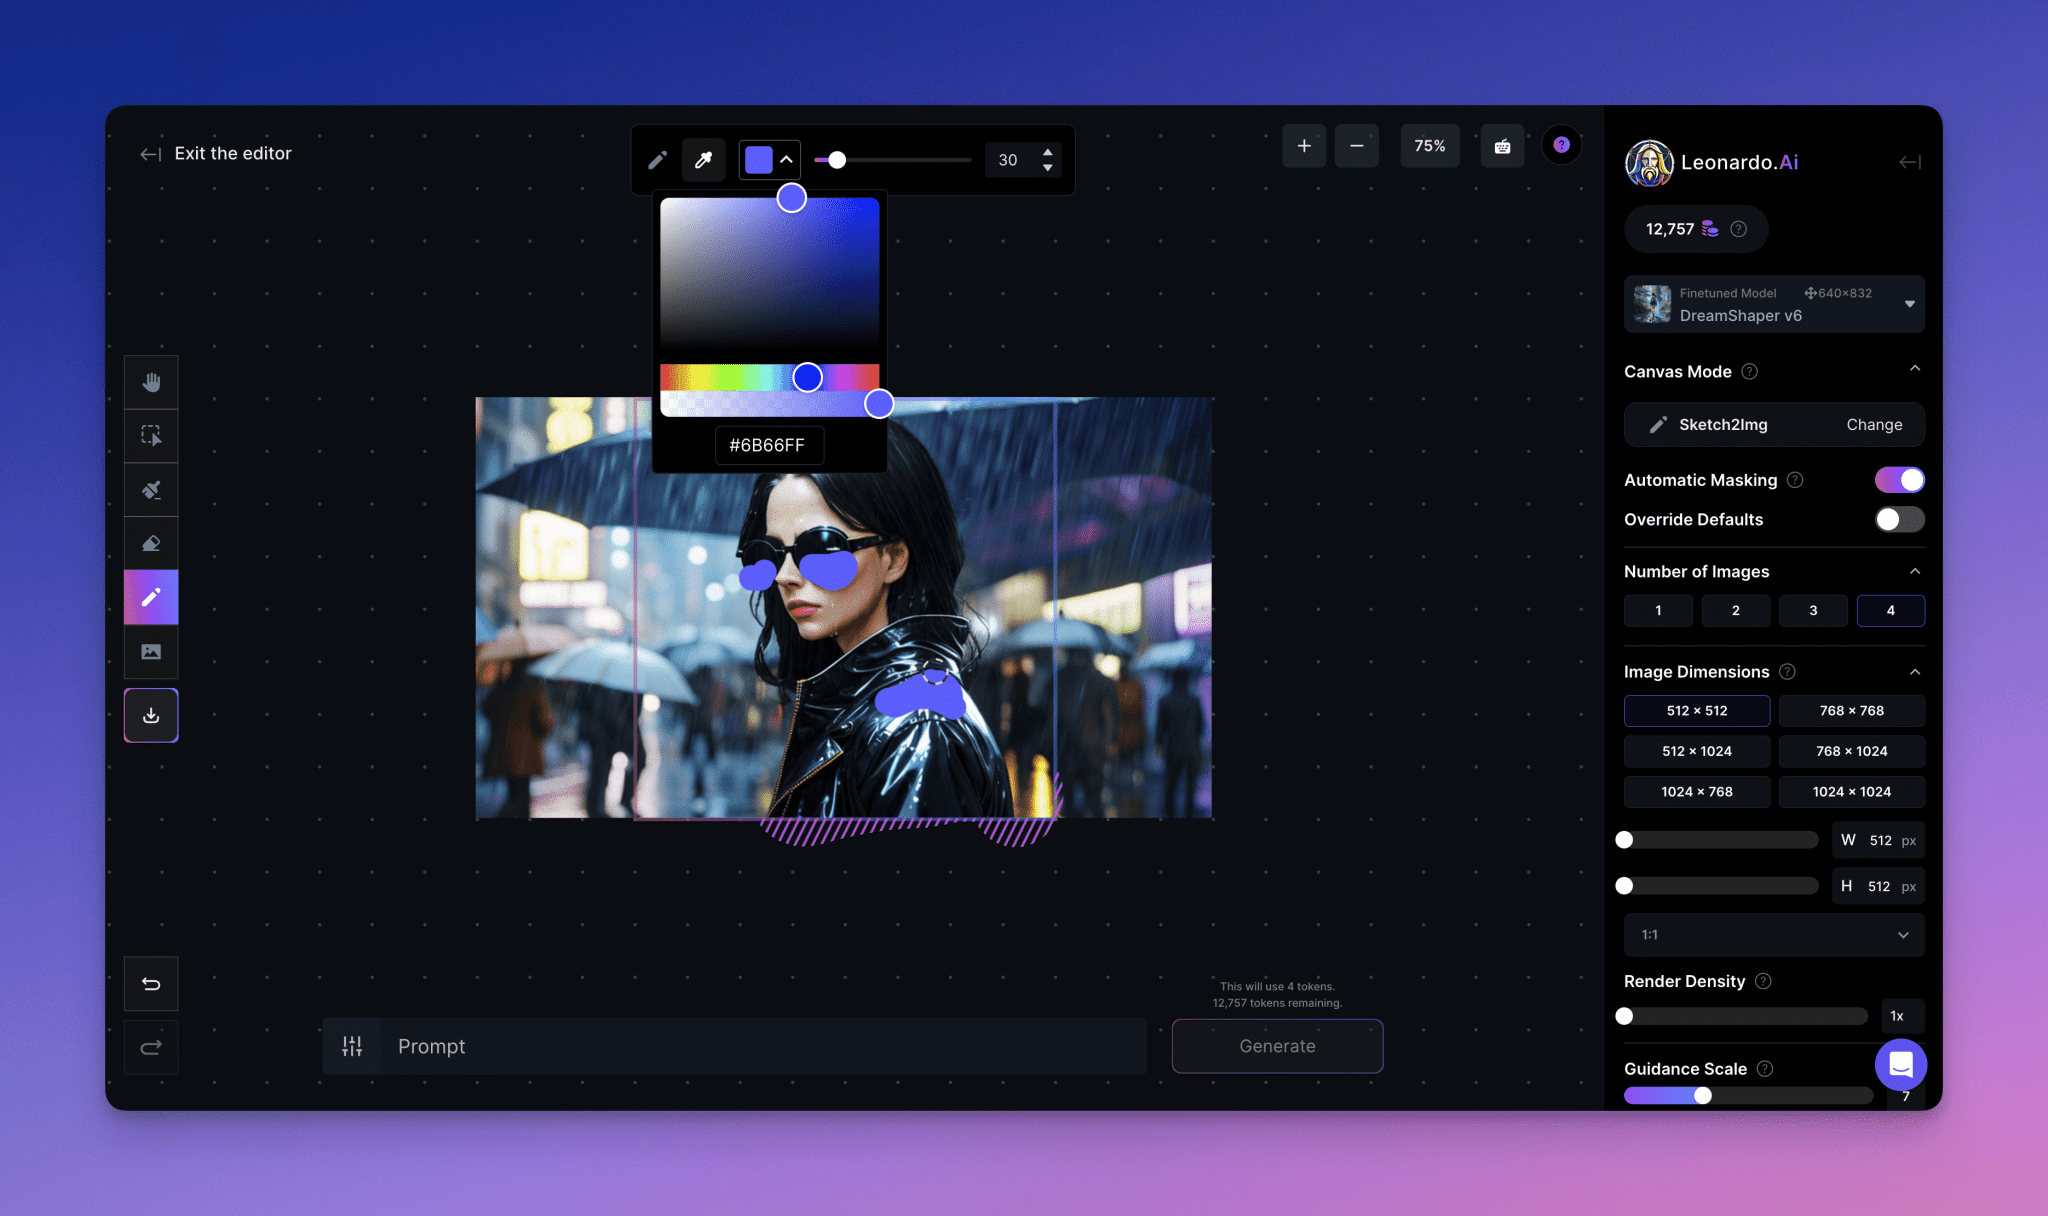
To use this handy new feature, select Sketch to Image from the Canvas Mode area, move the generator box to the desired area, and then select the Sketch icon from the left-hand toolbar. A new floating toolbar will appear, offering color and sketch size options. For the most effective results, try selecting exactly the color, rough shape, size and position you want, combined with good tips.
For example, the use of green coloring to represent the dragon, and orange to represent its flaming breath, maintains accurate proportions in accurately showing the position of its wings, feet, and tail in comparison to its distance and the position of other objects.
Image Restoration
Image Repair in the Canvas Editor actually allows you to select a specific area of the base image and then use our advanced tools to first tip and then fill in the unwanted, missing, or damaged portions to produce the desired result.
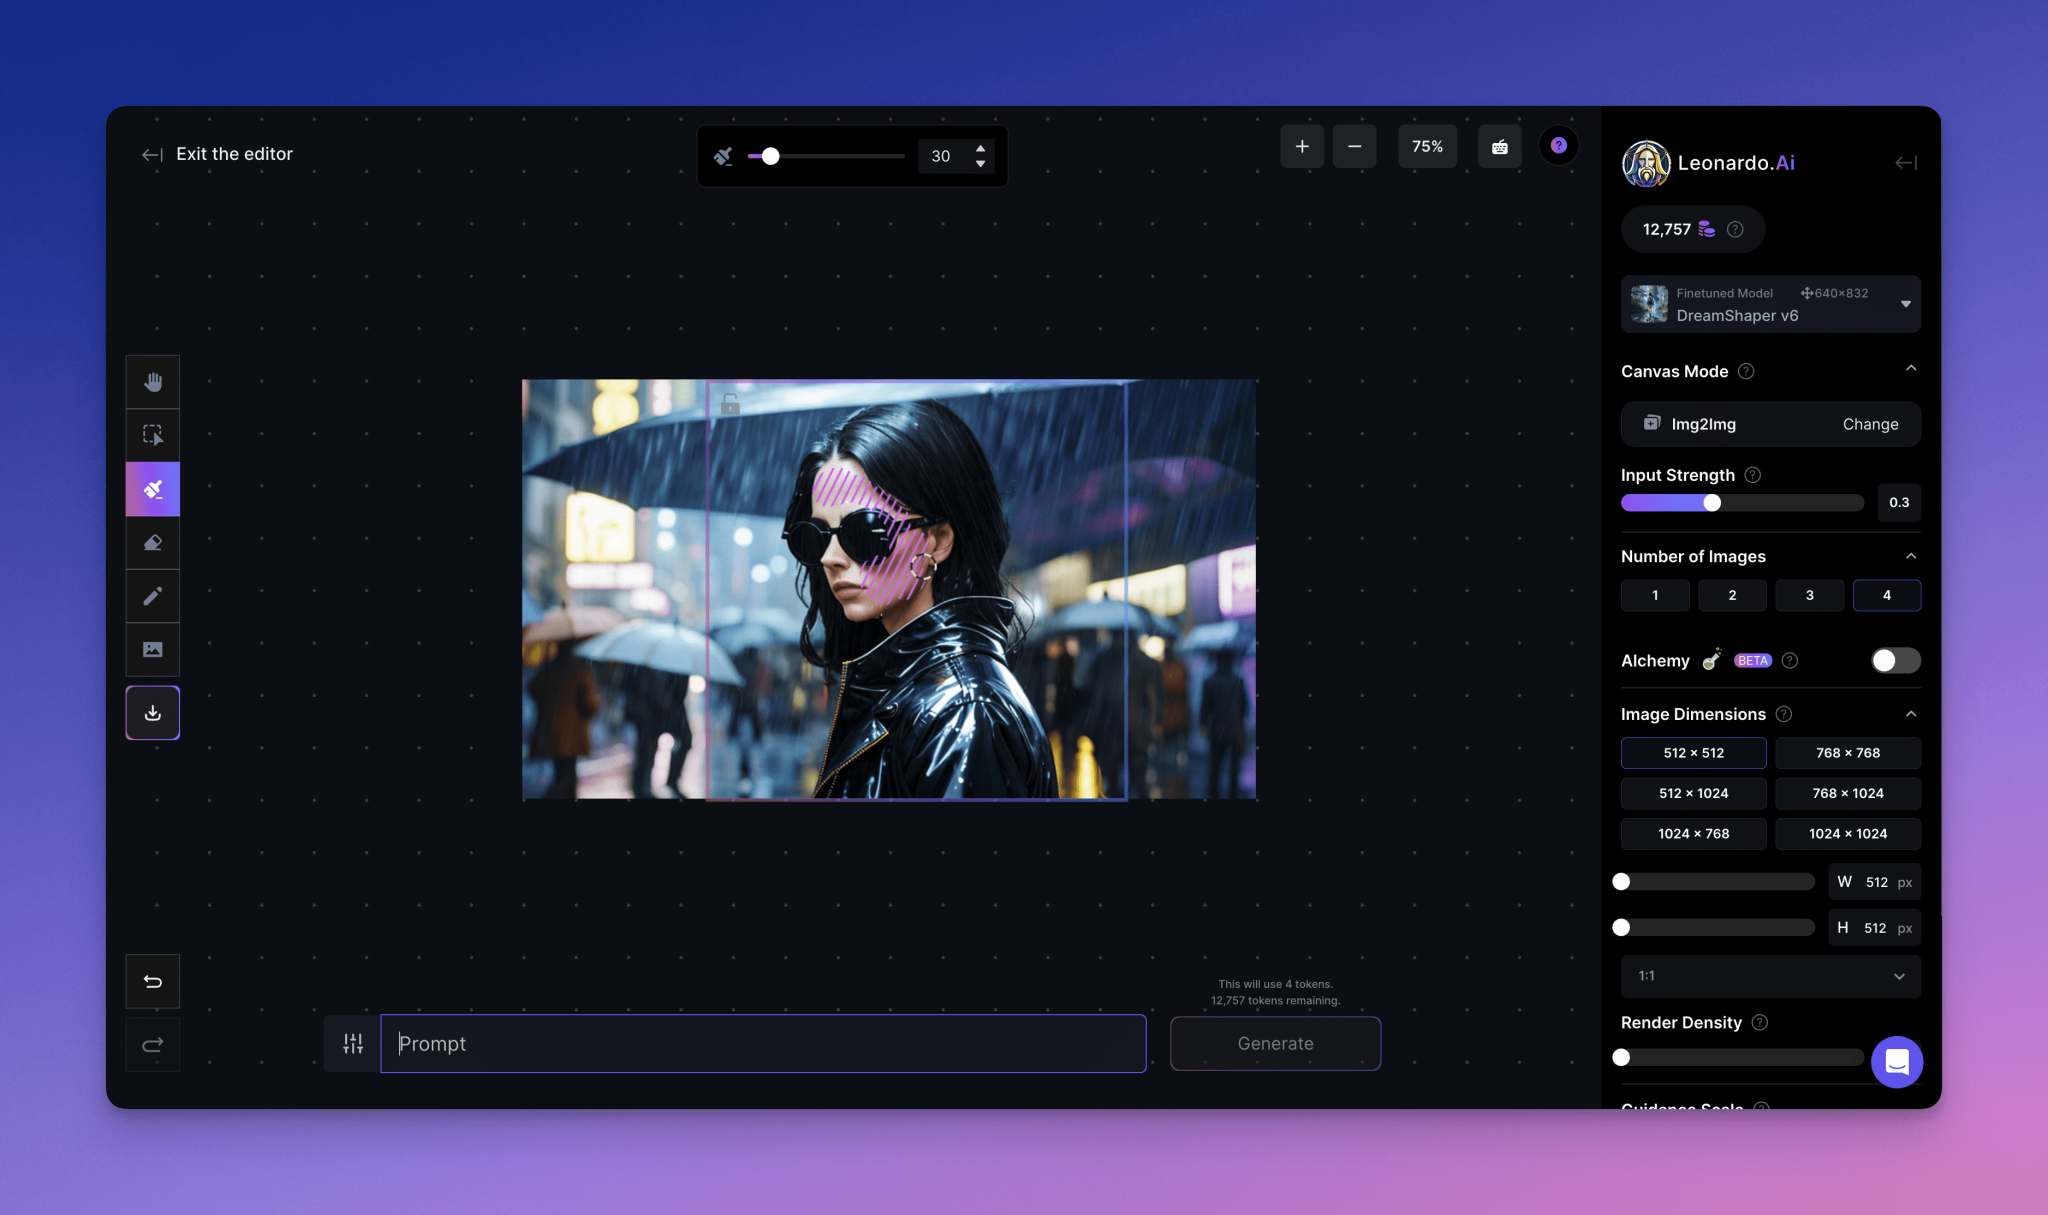
To use it, select Image Repair/Extended Draw from the Canvas Mode area of the right hand toolbar. Once selected, use the Generate box to highlight the area you wish to regenerate, make sure the lock is on (allowing editing) and use the Mask tool to highlight the area you wish to regenerate. Then simply enter the hints you want in the Generate field. (Keep in mind that the strength of the repair will change how well the new version follows the underlying image). If you have more than one image selected, you can cycle through the different options and choose the most appropriate.
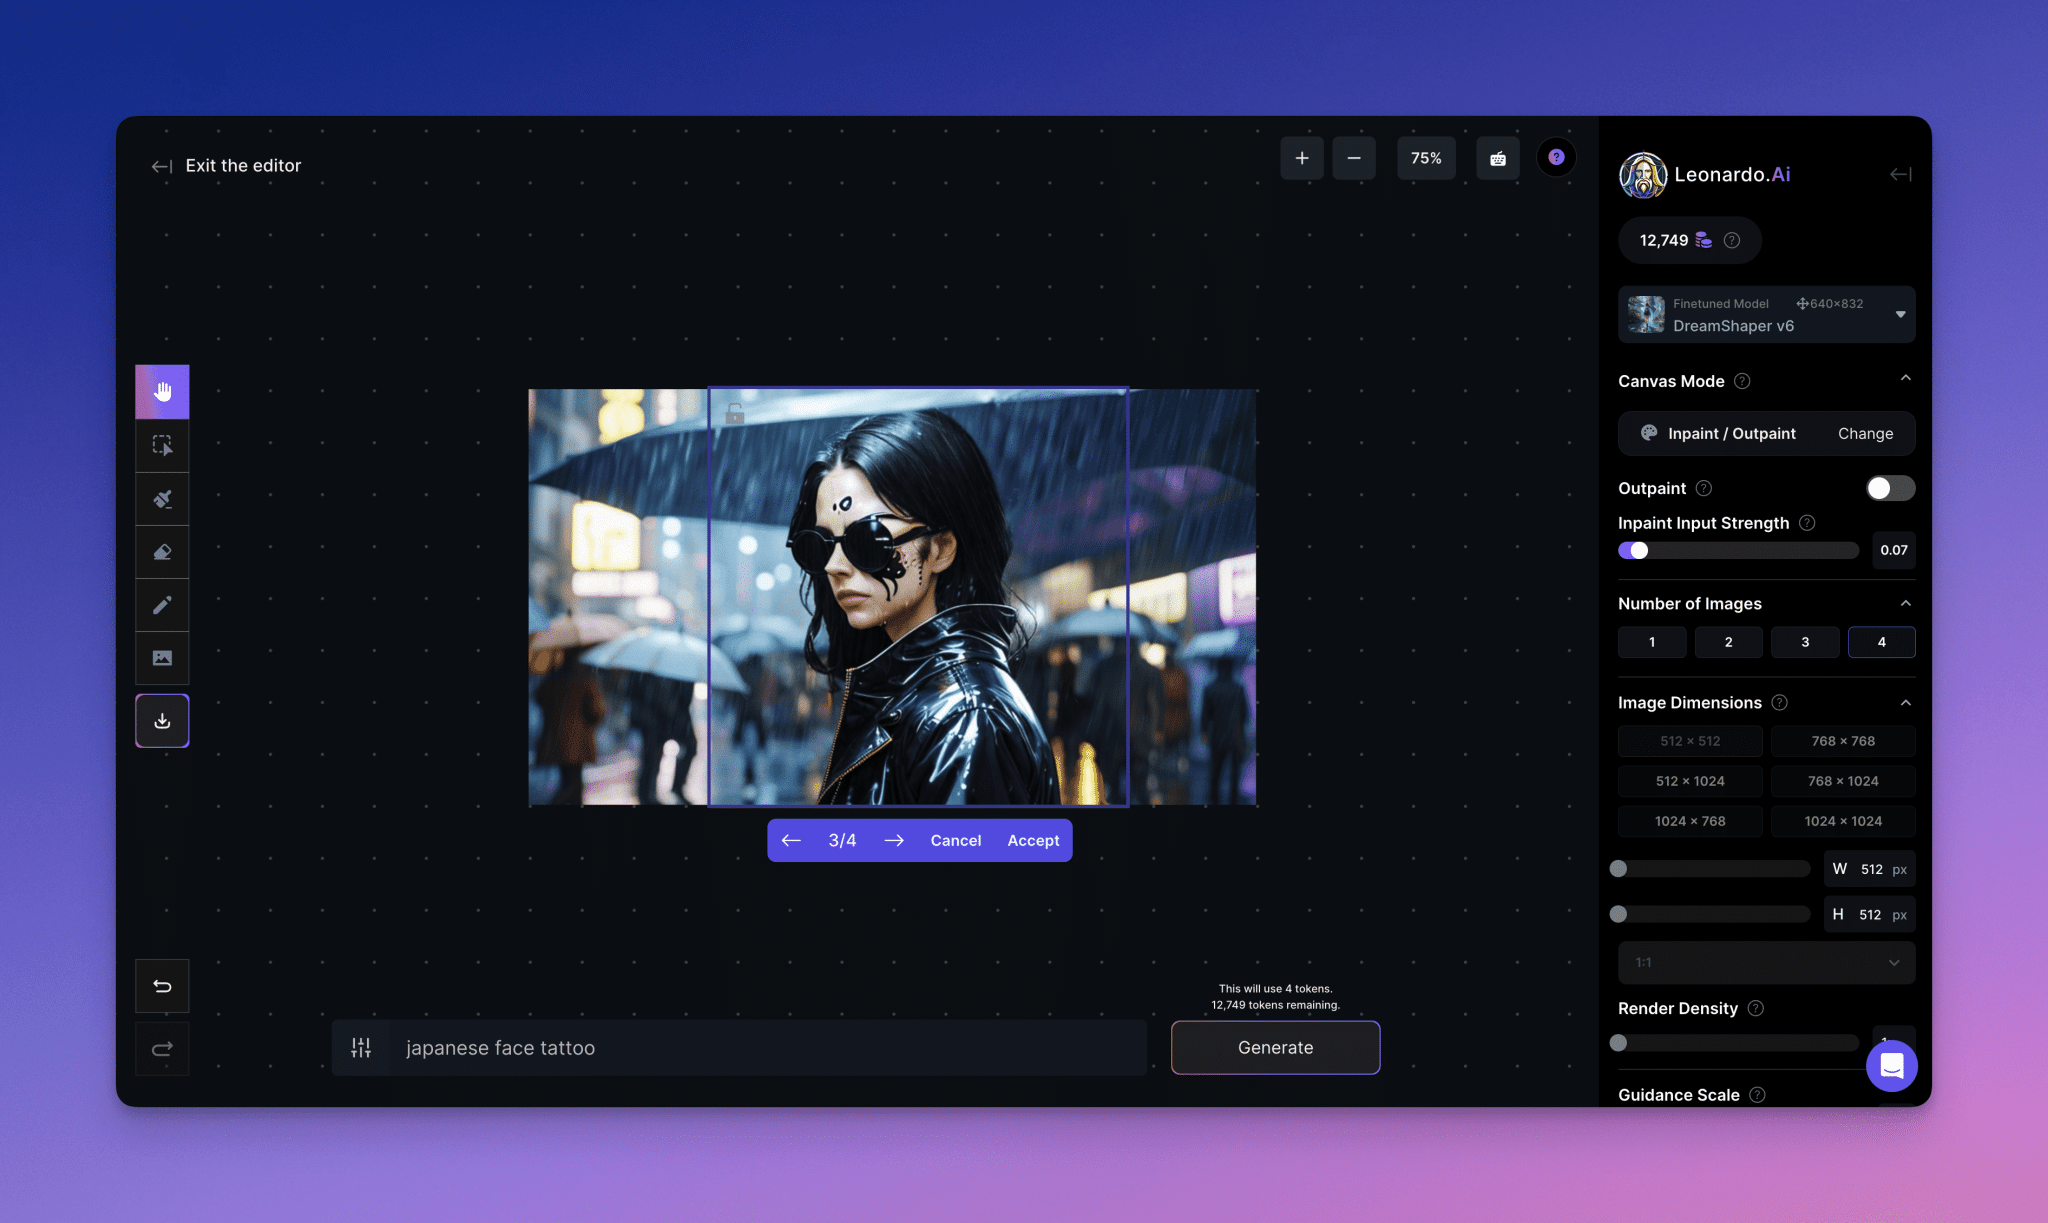
注意 – 如果您从输入中没有得到任何显著的结果,底层图像可能太强。在这种情况下,可能需要使用擦除。此外,放大的图像可能难以编辑,因此值得使用原始版本的图像,稍后再进行放大。
Extended Drawing
Extended drawing allows you to generate a coherent extension outside the boundaries of the original image. If done correctly, the canvas editor will extend the scene in a way that aligns seamlessly with the original image contents.
要使用它,请从右手边工具栏的画布模式区域选择图像修复/扩展绘制。一旦选择,使用生成框突出显示基础图像边缘之外的区域(同时保留足够的原始内容以便风格理解 – 大约60/40是一个好比例)。请记住,扩展绘制强度也将决定新生成内容对原始图像的忠实程度。

以上就是画布编辑器指南的全部内容 – 我们希望您觉得它有用!请记住,我们一直在添加新功能并增强旧功能,所以请务必不时回来这里查看更新。


